Free Tool
Google Analytics: Event Tracking Code Generator
Generate event tracking code for Google Analytics in seconds. Compatible with both Asynchronous (ga.js) and Universal Analytics (analytics.js).
What Is Google Analytics Event Tracking?
Do you need a Google Analytics event tracking code generator to track events on your site and get important insights for your digital marketing strategy? Then the onClick JavaScript by Google Analytics is what you need. Follow the steps above, and in a few seconds, the event tracking generator will give you the code you need to track user interactions on your website.
Implementing the Tracking Code on Your Website
The event tracking code generator creates tracking code to track clicks on your website for SEO and analytics purposes.
To implement the event tracking code, you need to add the tracking code to the HTML element people are supposed to click to complete the action.
For example, let's say you want to track the number of clicks on a link on your homepage that points to the pricing page. The HTML for that link might look something like this:

Once you add the Google Analytics tracking code to that link, it might look something like this:
Configuring Your Events as Goals in Google Analytics
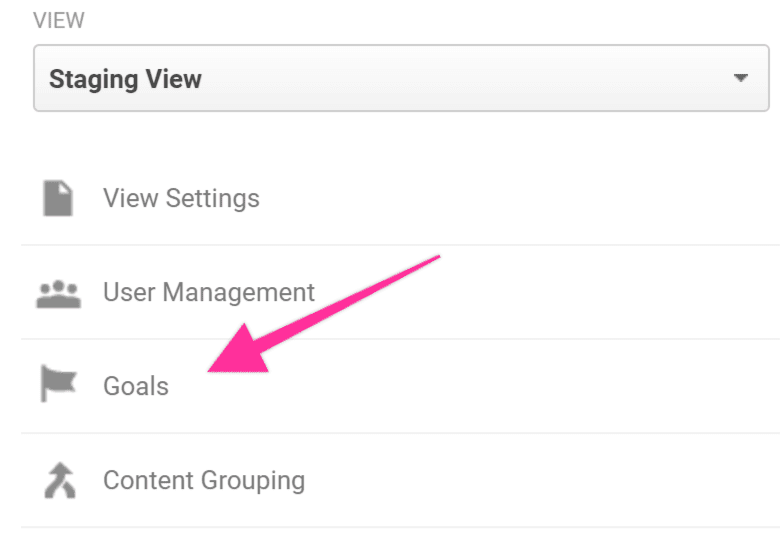
- Log into your Google Analytics and click Admin in the sidebar.
- Select the correct Google Analytics Account, Property, and View. Then, click Goals under the "View" column.
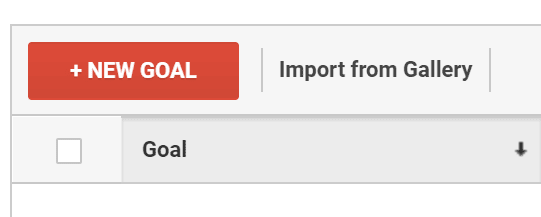
- Click New Goal.
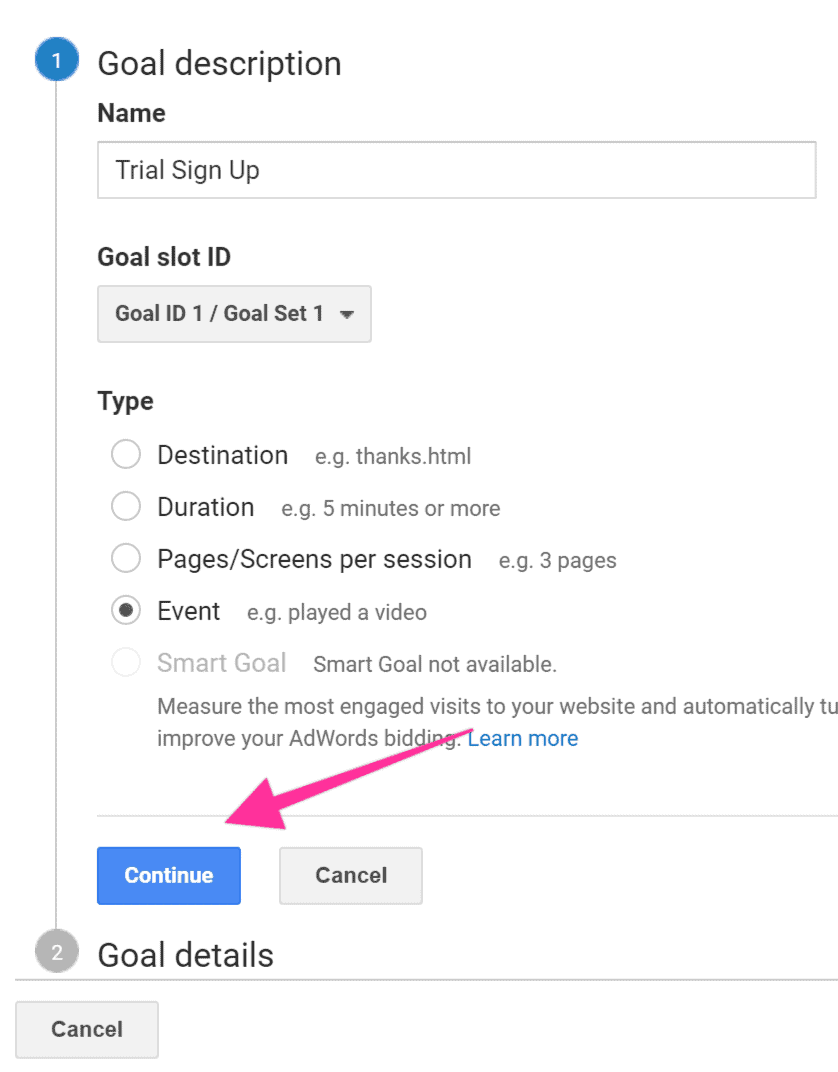
- Select a custom goal and name your Goal. Use something short and intuitive — it should be obvious for you or anyone what it is about since this name will appear on your reports.

- Select your preferred Goal ID and Goal Set slot (if you don't have any Goals yet, leave the default option). Select Event, and click Continue.
- Enter the same values for the "Category", "Action", and "Label" that you added in the tool above, and make sure all dropdowns are set to Equal to. Leave "Value" blank.
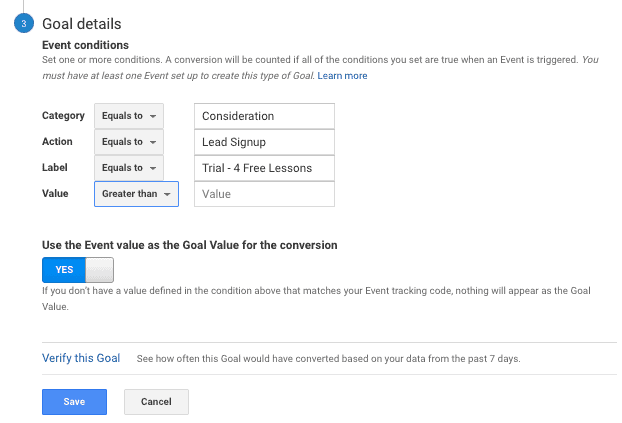
- Click Save and you should see the Goal you just created. Make sure the "Recording" toggle is set to On.

Testing Your Google Analytics Goals
- Install the Google Tag Assistant Chrome extension on your Google Chrome browser. This tag assistant helps verify Google tags like Google Analytics and Google Tag Manager (GTM) on your web page.
- Open your website using Chrome, click on the Google Tag Assistant icon, and click Record.

- Click on the element that's supposed to trigger your goal.
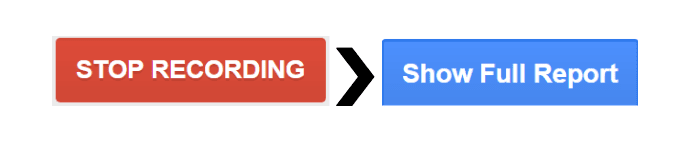
- Click on the Google Tag Assistant Chrome extension again and click Stop Recording, then click Show Full Report.
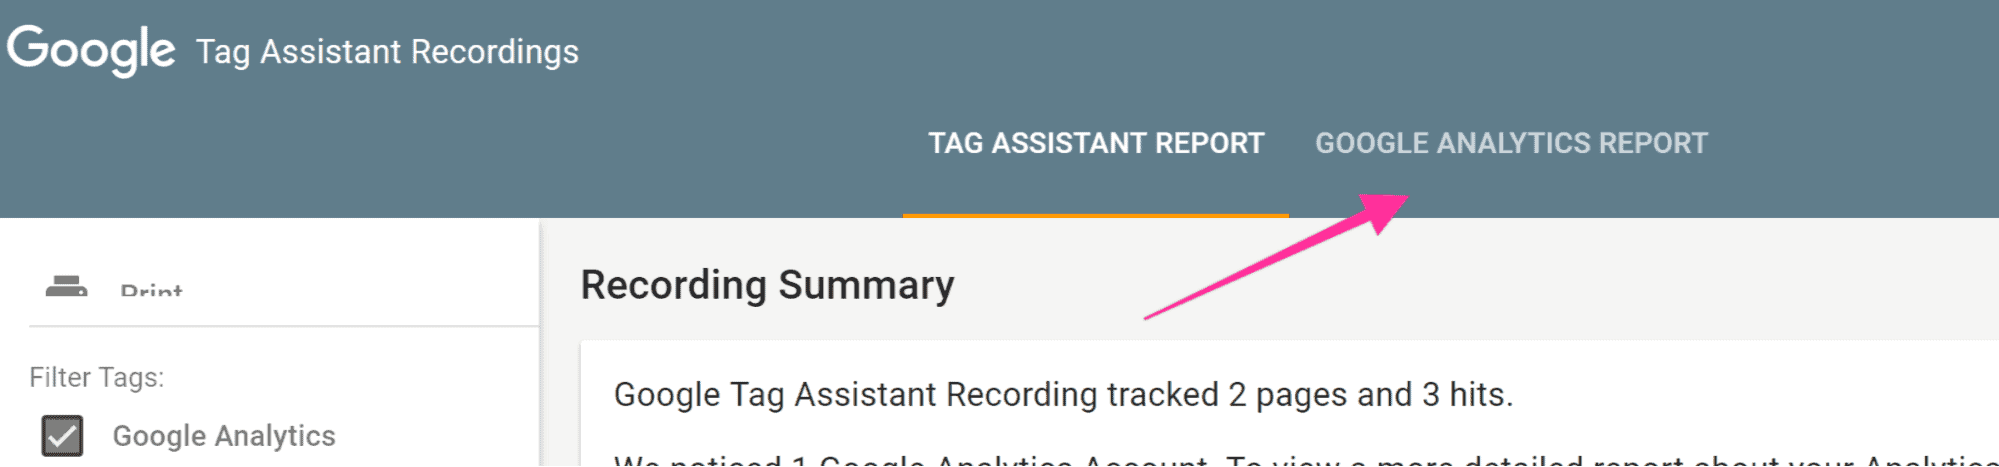
- Select Google Analytics Report.
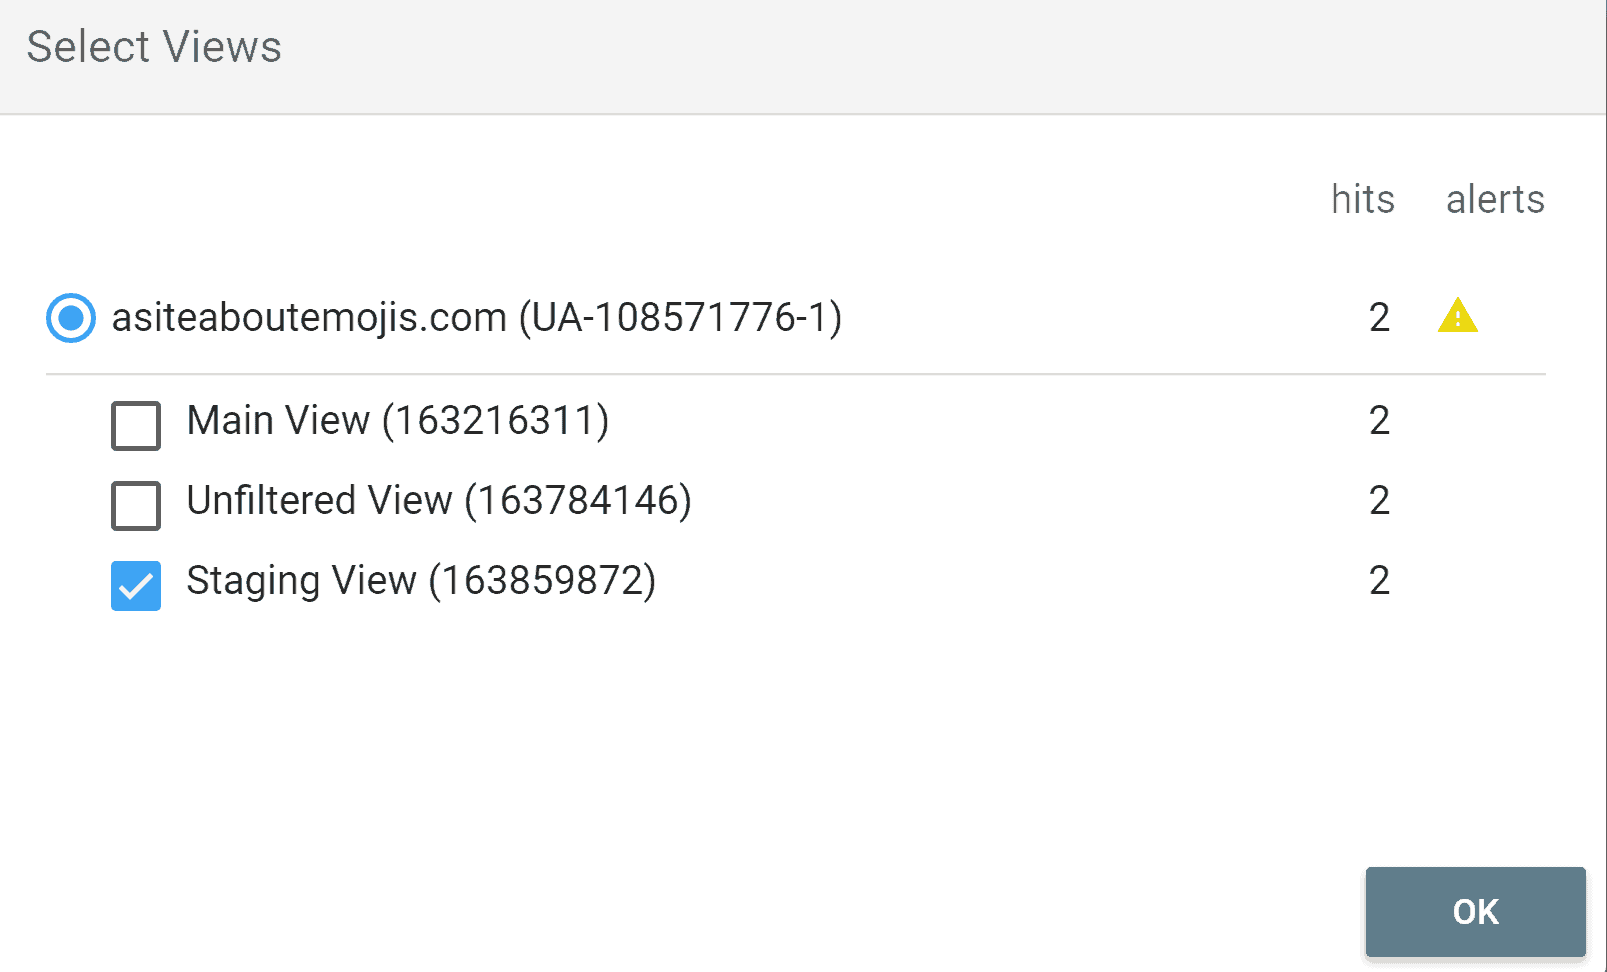
- Select the view that you want to test and click OK.
- Scroll down until you find the Conversions section. You should be able to see the name of your Goal, your Conversion Value, and a green tick after it.
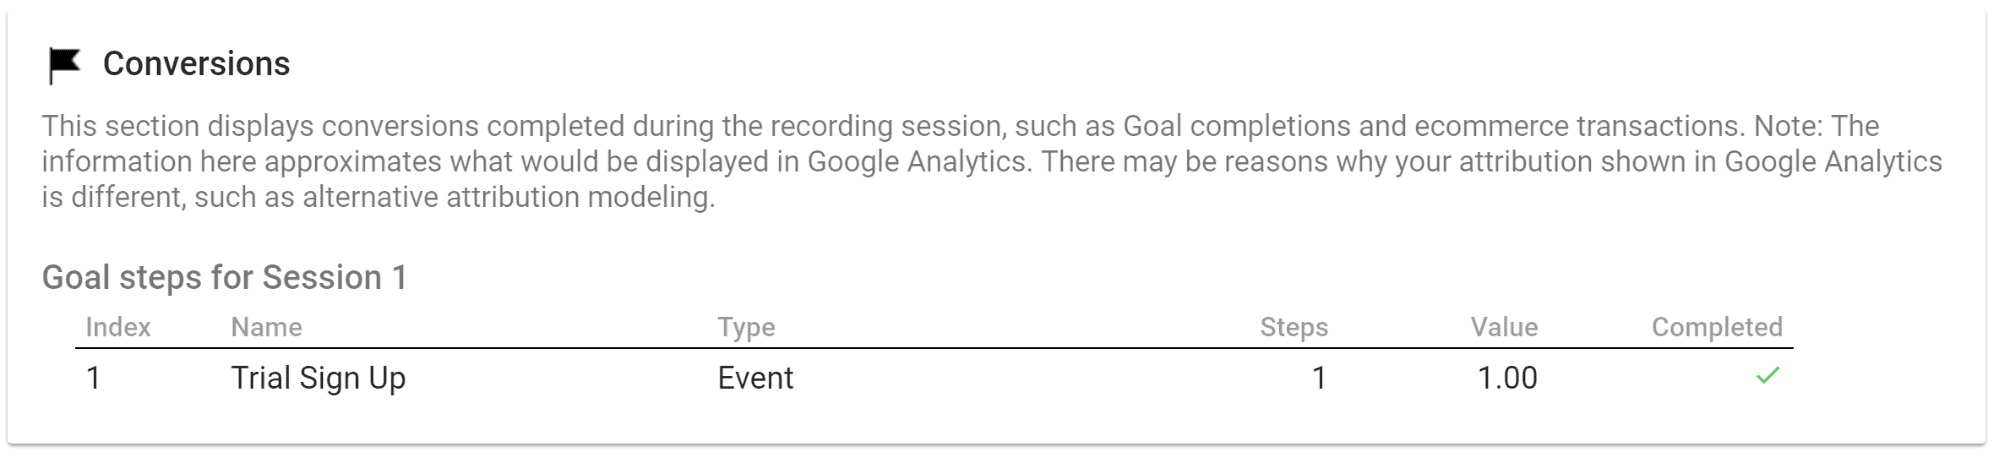
That's it! You've correctly set up your click event as a Google Analytics goal.
Additional Resources
If you found this tool useful, check out these resources to level up your digital marketing: