


Say goodbye to the awkward “What are we posting this week?” question. Here’s how to create a comprehensive content marketing strategy from scratch.
Today, you’re going to learn exactly how to create a powerful content marketing strategy from scratch (download the free template below.)
- If you’re just getting started with content marketing, creating a content calendar will help you publish high-quality content on time.
- If you’re already producing a lot of content, it’s important to create a new content calendar to keep your team organized and delivering on schedule.
What types of content are you posting? What is your publishing schedule? Who’s responsible for what? The larger you are, and the more important content marketing is to your business, the more important all of this is.
In this blog post, I’m going to go through the exact step-by-step process that you need to create a content calendar.
Let’s dig into some of the high-level goals before we dive into the template itself:
- The goal: To create an editorial calendar to manage your team’s content marketing efforts.
- The ideal outcome: You’ll have a good, well-set editorial calendar template to follow whenever content needs to be published on different platforms according to your marketing strategy.
- Prerequisites: You want to make sure you have a customer persona defined before you start working on your content calendar. Very simply put, a customer avatar is just a fictional person that represents a certain customer that you have – and having this in place will help you align your content strategy with your business and marketing goals.
- You also wanna make sure you have your keyword strategy in mind. If you haven’t done any keyword research yet, you want to do that before you go into the content planning or content calendar. Knowing the primary keyword that you’re optimizing a particular piece of content for is important.
- The importance of this action: Having a content calendar in place helps your entire team save time, be on point, scale out and figure out all the actions that they want to do for an entire year, to create great content.
- Where this is done: We’re going to be doing this in Google Sheets today as well as Trello (a project management tool.) Trello is free to use, and the premium account is (at the time of this blog post), about $4/ month.
- Make sure you create an account before you get started with the Content Calendar Template.
- When this is done: You want to do this do this any time you have decided to stop being so sporadic about your content publishing, and you want to centralize this and make it a repeatable process.
- Who does this: You, your content manager, or an agency marketing team that you’ve hired.
Get This Entire Walkthrough and All the Resources in This Post
The Content Calendar Template
So, let’s get this going—we’ll start with a brief overview of how to use the Brainstorming and Daily View sheets, and then move on to the Trello integration.
The Brainstorming Sheet
The first thing you want to do before you get started is brainstorm.
Grab members of your content team of content marketers, social media marketers, writers, and SEOs, put everyone into a room together, and jot down every conceivable idea for content marketing in the context of your customer avatars.
Put it all in the “Brainstorming” sheet.
- These brainstormed content ideas should be representations of your customers’ wants, needs, and desires.
- Think of every piece of content that you think will be valuable for your customers and put them into the Google Sheets or Microsoft Excel Spreadsheet.
- Don’t prioritize anything—this is not the time to worry about this too much. Even if you’re iffy on the idea, just add it in there.
- Be liberal about this in the beginning and add more content—as much as you can. You will optimize it and whittle it down a little bit later.
For example, let’s say I was working at a New Hampshire wedding venue. I have this amazing venue in New Hampshire, it’s designed for weddings, and I’m trying to get new customers that are booking weddings.
I want to brainstorm a bunch of content marketing ideas.
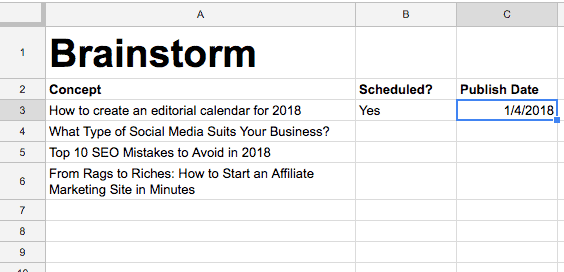
In the brainstorming section, I can add any concepts I can think of. I won’t worry about keyword research. I’ll just kinda think about how my users would search for things and what they would find helpful.
In my Brainstorming sheet, I could add stuff like:
- “Best wedding venues for Millennials”,
- “Funniest wedding videos of 2019”,
- “Best wedding invitation ideas”
You can do this ad nauseam for as long as you can – just throw a bunch of ideas in there.
As you go along, if you decide to use them, you can schedule them.
Then, if you decide to publish one (or more) of these ideas, you can just add the actual date you’ll publish them.
The Daily View Sheet
Once you have completed the brainstorming phase, you have all your ideas in the sheet, and you can switch over to the actual calendar template.
For this example, I took one of the topics I entered in the Brainstorming sheet and went through it in the actual marketing editorial calendar template to show you how it all works out.
Here is the break-down:
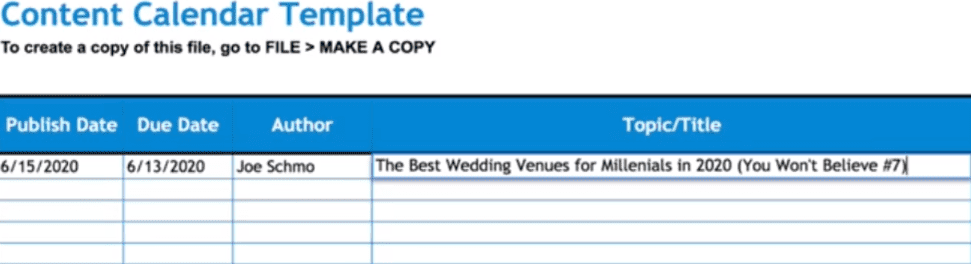
Publish date
This is going to be the date that you want to publish the content. I just randomly picked a day in the future (let’s say, June 15th, 2024).
Due date
This is usually one or two days before your publish date because you might want to have an editor look at the content, fix spelling errors, and so on.
Author
This is pretty self-explanatory.
Topic/Title
Let’s say I liked the first idea in my Brainstorming sheet (“best wedding venues for Millennials”). So I grabbed that and pasted it in the “Topic/Title” in the Content Calendar Template sheet.
Since this is a random idea, I want to change it into an actual title. So I went for “Best Wedding Venues for Millennials in 2020 (You Won’t Believe #7)”—something Buzzfeed-y and annoying like that.
My recommendation is to spend quite a bit of time and make sure you craft a very good headline. One of the best tools to help you with this is CoSchedule’s Headline Analyzer, example.

Content/ Details
This is just a space to enter a very brief description of what your content might be, if there are any important dates, events, or very specific marketing campaigns you want to correlate it with, etc. In my case, this was “a post on the best wedding venues for Millennials”.
If you have content writers working on your team, you can use this space to give them more details about the content they need to produce.
Primary Keyword
As mentioned in the beginning, keyword research should be at the top of the workflow of your marketing strategy. Do thorough keyword research before you start working on our free content calendar spreadsheet.
In this instance, let’s say I did the research, and “best wedding venues Millennials” was a high-volume keyword—so that’s the keyword I’ll target.

Target Persona
At this point, you’ve already created your target persona, so you just enter the one that this post is targeted to.
For example, let’s say I had a target persona named Liz, and she’s a 25-30-year-old woman about to get married—she is the representative of the target audience I’m aiming for.
Offer/CTA
If you’re familiar with Sales Funnels, you know that you always have your users at some part of the funnel (the top, the middle, or the bottom-funnel).
In my example, this particular type of content felt like something that belongs at the top of the funnel. So, let’s say I would want readers’ email addresses in exchange for something I give in return—could be something like a checklist for Millennial wedding venues, for example.
Content-Type
This is pretty straightforward too: is it a blog post, a case study, a video, a social media marketing post, a photo, an infographic, or a digital tool?
This depends on your business and how that works. For most people, most of the time, it’s probably blog posts or social media posts.
That’s about it—a very quick example of how to take this Content Calendar Template, layout the entire workflow for yourself, and set it up for the entire marketing calendar.
Using Trello to Manage the Content Creation Process
OK, so that was the template and you can use it to scale out the whole plan for the year. However, managing the process of creating the content is a little bit different.
I will use a Trello board to manage this process.
You can download this walkthrough above and get a copy of the exact Trello board we use—so you don’t have to create one from scratch.
The basic idea here is that you will dump these different pieces of content into different “buckets”, and then assign them to different members of your team, based on how you’re managing the process.
Let’s jump into the Trello board.
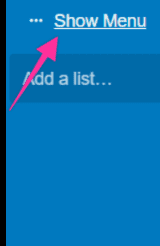
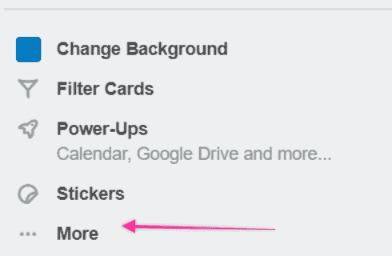
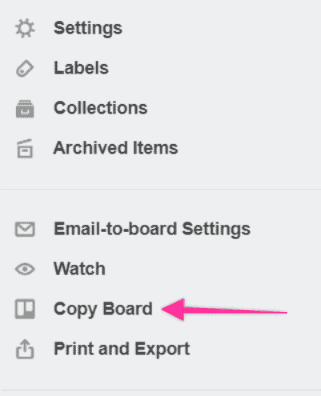
To make a copy of it, go to the top right-hand corner, click on “Show Menu”, go to “More” and then click on “Copy Board”.
Okay, so you’ve got your Trello board and you’re good to go.
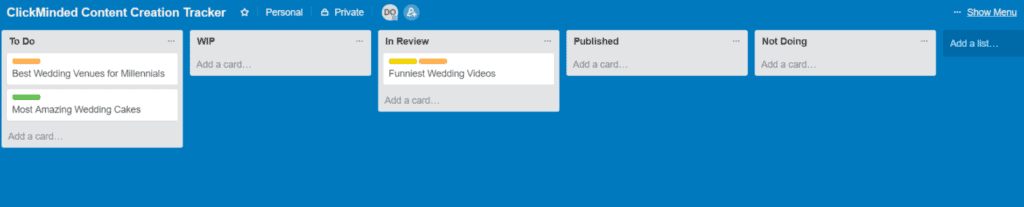
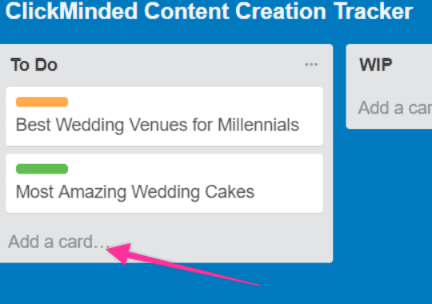
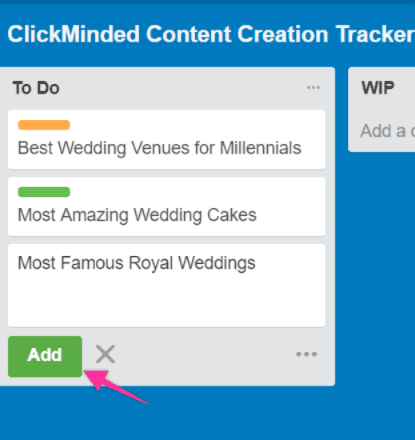
First, add every piece of content that you decided was good for publishing under the “To Do” list on the Trello board.
For the example at hand, I’ll pretend that all of my brainstorming ideas are cut. And so, I went ahead and started dumping under the “To Do” list: “Best Wedding Venue for Millennials”, “Funniest Wedding Videos 2019”, “Best Wedding Invitation Ideas”, etc.
So once you have all your ideas in there, you can start assigning them.
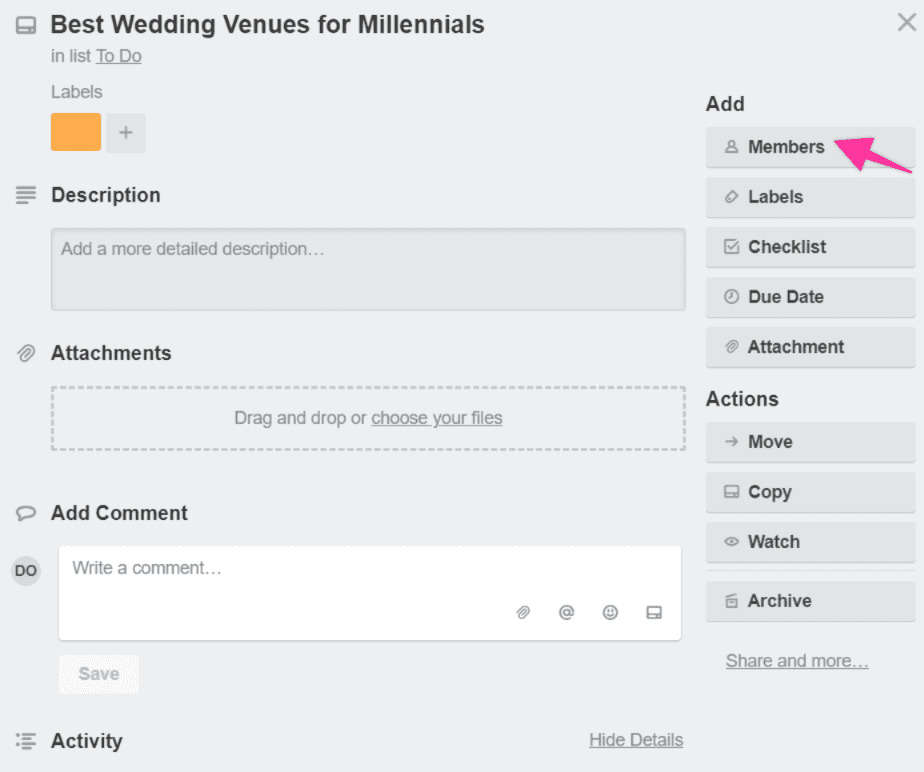
Make sure you get all your other team members up on Trello. You can go ahead and add members by just clicking on the card you want to assign → Members → Add your team member’s email address, then assign).
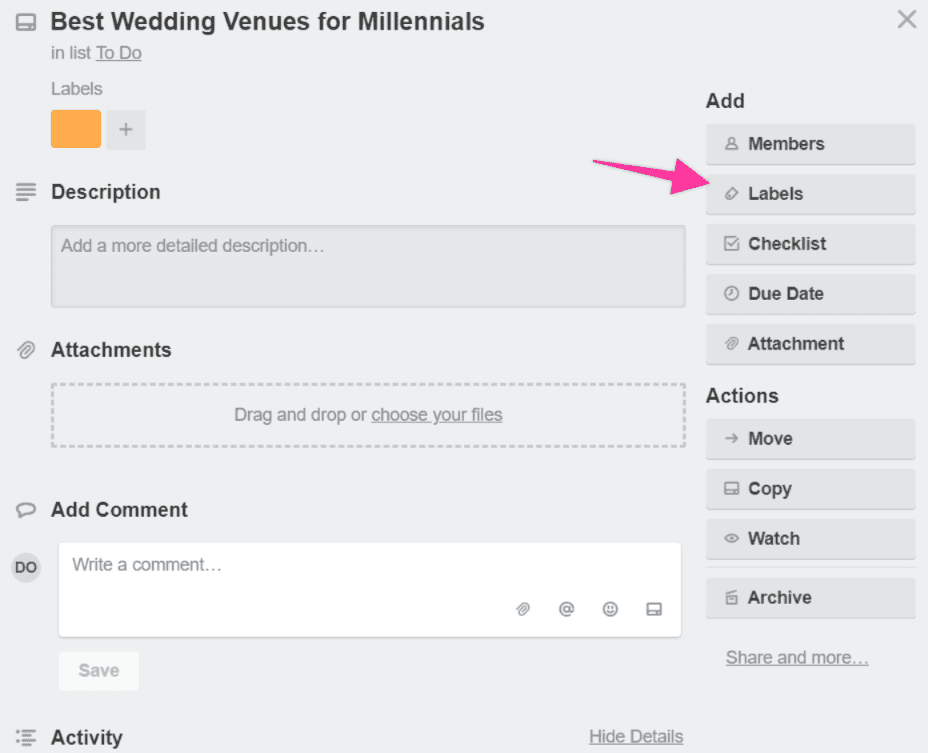
Keep in mind that you can also add different labels to each of the tasks.
- Let’s say I’m assigning the “Best Wedding Venues For Millennials” article and I want to label it. For instance, it could be a long-form article—so I would add a green label to it.
- I would label “Funniest Wedding Videos of 2019” with a different color (red, in my example) because it’s a video.
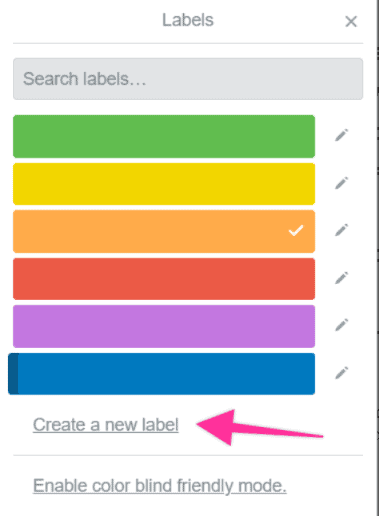
You can create as many labels as you want, according to your particular needs and how you want to structure your tasks.
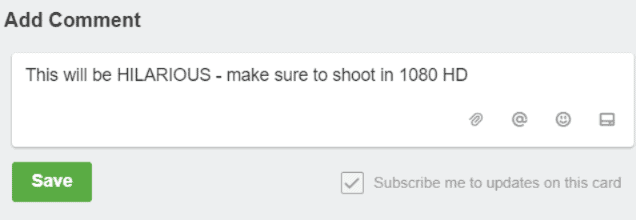
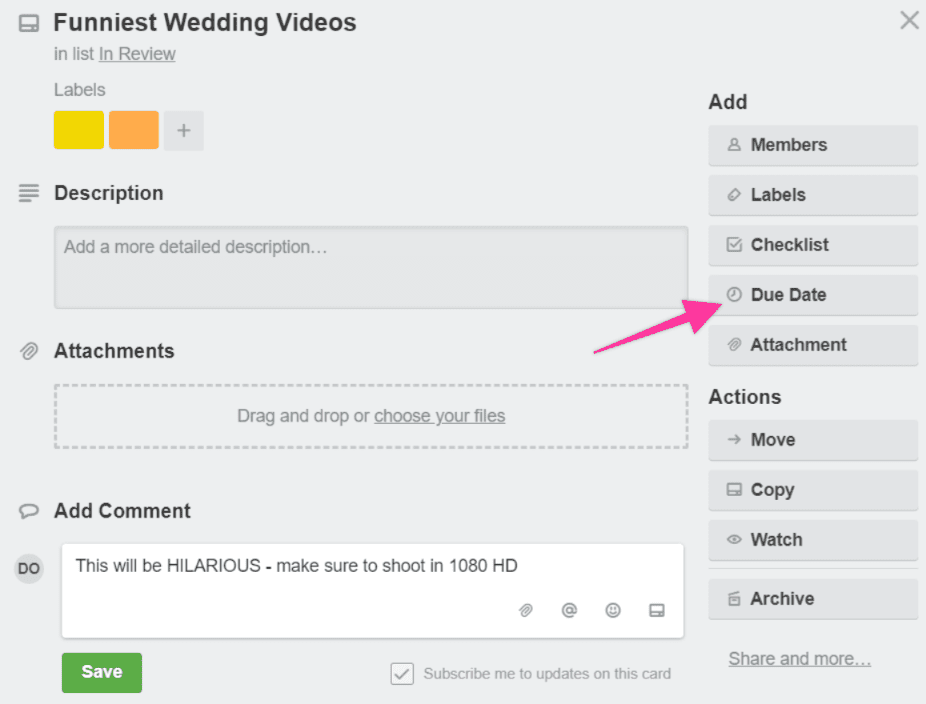
You can use these cards to add comments as well.
Also, Trello allows you to add a due date as well (see image below).
Once you have added all your planned content tasks to the To-Do Trello board, you can start moving the cards around.
For instance, whenever your staff is working on something, you can instruct them to move that Trello card into the “WIP” (work in progress) list.
Once they’re finished, you can instruct them to tag the content manager in a comment and move the card to “In Review”.
Finally, when the content has been reviewed and published, the card can be moved to the Published board.

If something happens and you decide not to do a particular piece of content anymore, you can move it to “Not Doing”.
That’s it! That’s how you can streamline your content production process using the Content Calendar Template and the Trello board template I shared with you.
Following these steps will help you make your life a lot easier, and more organized, and help you grow your business with content marketing.

