In this blog post, you will learn exactly how to add Google Tag Manager (GTM) to your Squarespace site, which should only take about 5 to 10 minutes.
This is the FIRST thing I do whenever I start a new Squarespace website or any website for that matter.
Adding Google Tag Manager (GTM) is easier on WordPress and it can be done with a simple plugin. However, on Squarespace, you will have to Google Tag Manager JavaScript snippets to your Squarespace site.
Google Tag Manager (GTM) is a robust and extensively utilized tag management solution created by Google.
It offers marketers and website owners a streamlined and effective method to effortlessly implement and oversee a variety of tracking codes, scripts, and tags on their websites, eliminating the need for manual coding.
With GTM, marketers can effortlessly add, modify, and deactivate tags without making direct changes to the website’s underlying code, thereby simplifying implementation while providing enhanced control and flexibility over tracking and analytics configurations.
Google Tag Manager allows you to easily deploy code and tracking pixels to your Squarespace site without the need to learn web design or ask your website builder to do it. The Google Tag Manager(GTM) tool is one of the go-to tools for all digital marketers.
The entire process to add Google Tag Manager to your Squarespace site should take no longer than 5 minutes.
Now let’s get started.
Getting your Google Tag Manager container code
First, you’ll need to grab the Google Tag Manager code from your account.
- If you don’t have an account yet, sign up for Google Tag Manager (GTM) and set up your account. You’ll get your tracking code right away.
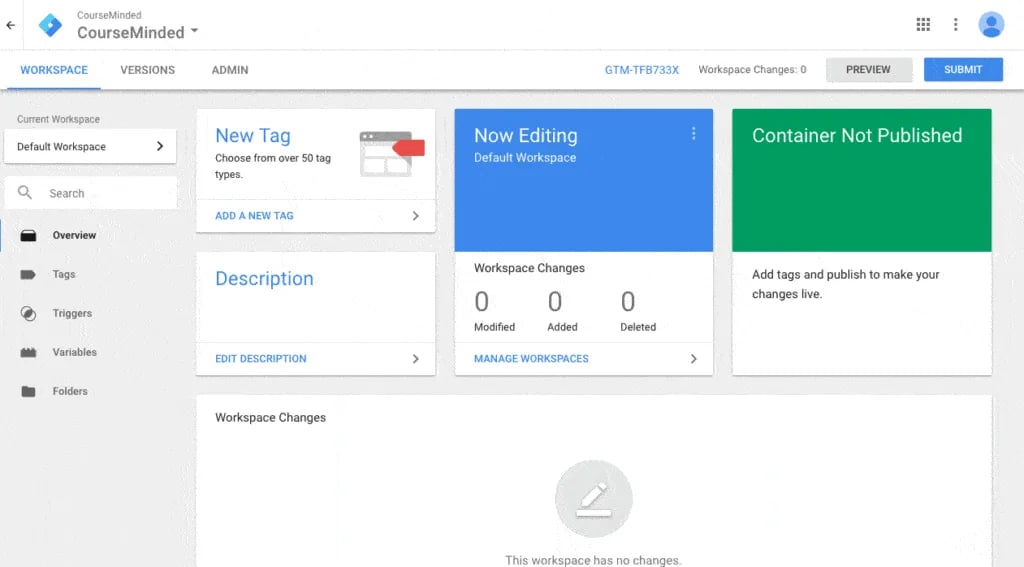
- If you already have a Google Tag Manager account for this website, log into your account, click “Admin” on the top navigation, and then click “Install Google Tag Manager”.
You’ll see two pieces of tracking codes. You will need both in the next chapter.
If this is your first time using Google Tag Manager, remember to publish your container by clicking “Submit” on the top right corner and then “Publish”.
Adding Google Tag Manager to your Squarespace site
In this step, you’ll install the Google Tag Manager code you got from Google Tag Manager on your Squarespace site.
Log in to your Squarespace account, select the website that you want to add Google Tag Manager to.
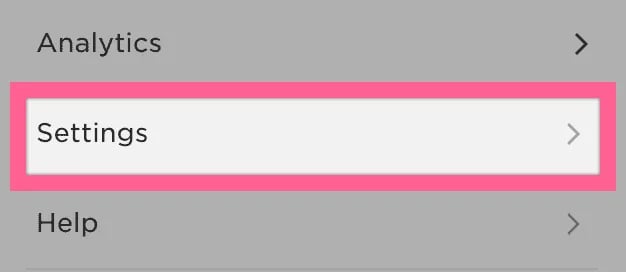
On the sidebar click “Settings”, “Advanced”, and “Code Injection” functionality.
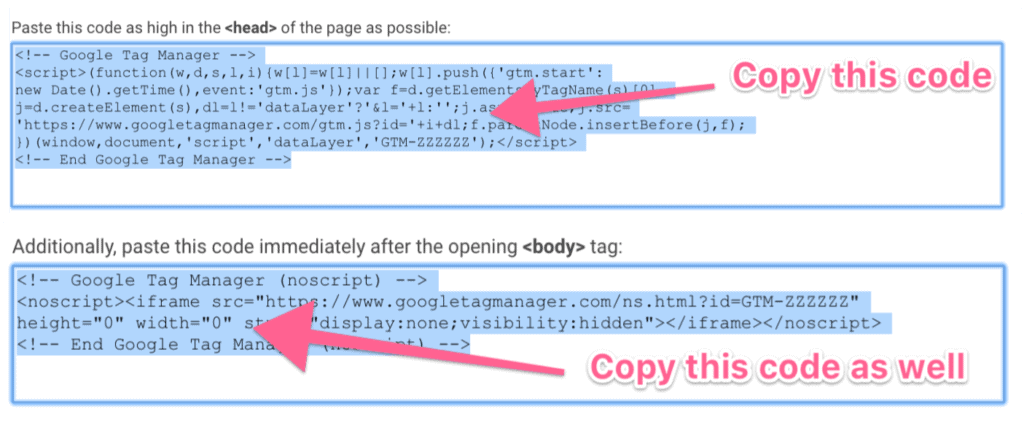
Paste the header code snippets you got from Google Tag Manager, according to the picture below:
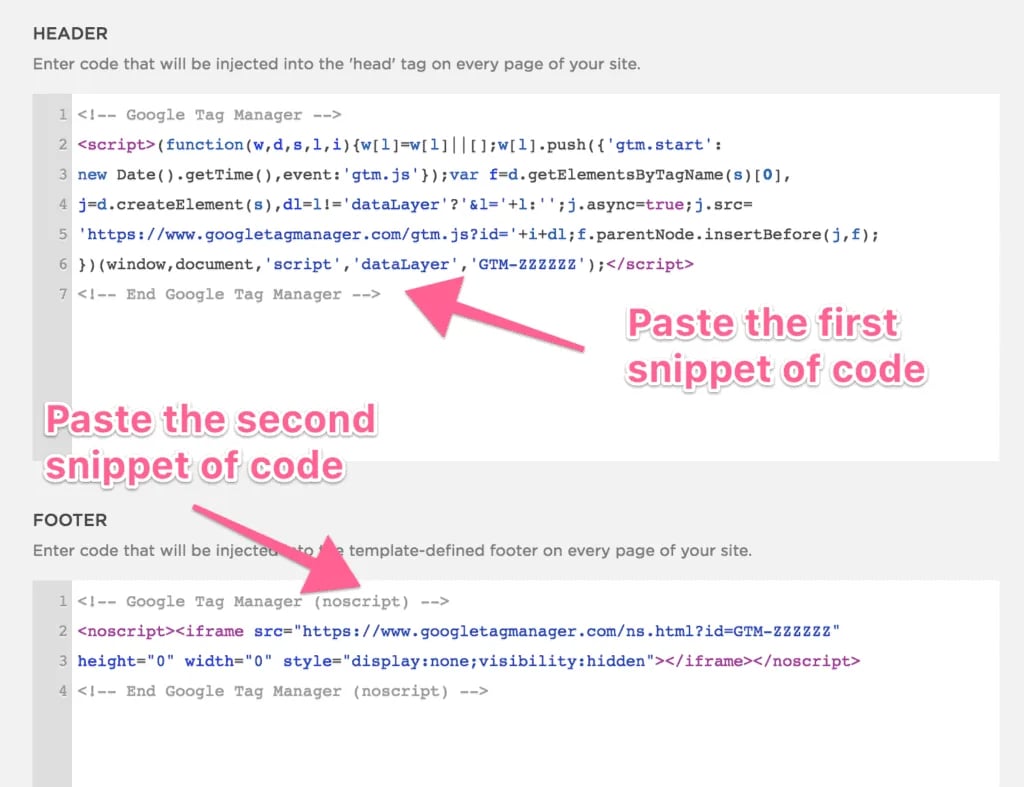
Click “Save” and that’s it! All that’s left is to check and see if everything is working properly in real-time.
Testing your installation
To wrap things up, let’s make sure everything is working correctly.
To test, you’ll need to install the Google Tag Assistant Extension on Google Chrome.
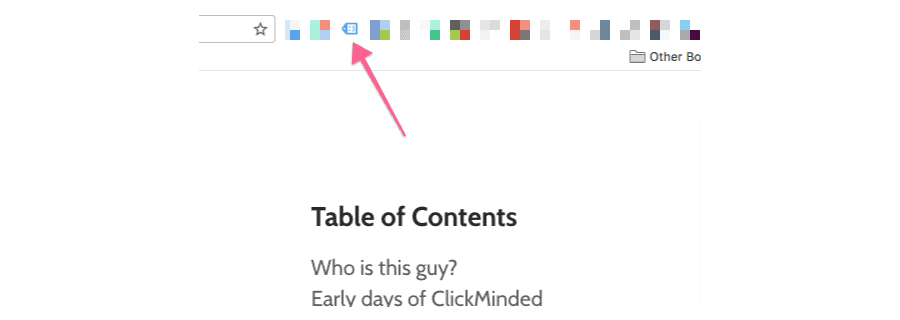
Once you’ve done that, open your website and click on the Google Tag Assistant icon.
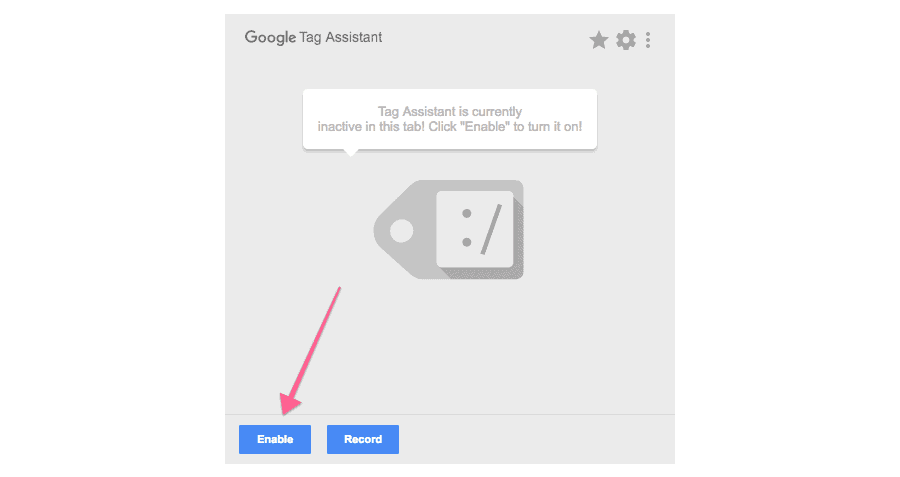
Click on “Enable”.
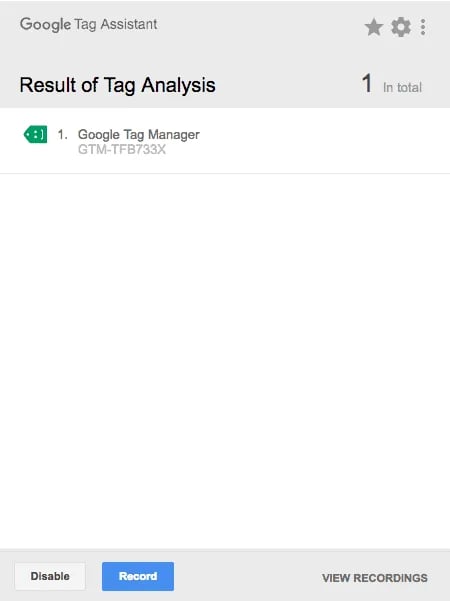
Refresh the page and click on the Google Tag Assistant Chrome Extension again.
You should see a green tag for Google Tag Manager, indicating that the installation was successful.
That’s it!
If you’ve followed all the steps until now, you’ve now installed Google Tag Manager on your Squarespace site and the container will be included in all your pages—including checkout pages.