This is the FIRST thing I do whenever I start a new website.
Google Tag Manager (GTM) is a tag management system that allows you to easily deploy code snippets and tracking code to your site without the need to edit the code or ask your developer to do it.
With GTM, you can quickly add and update tags (measurement codes and related code fragments) on your Shopify website or Shopify app. There are two important things to mention about the Shopify Google Tag Manager I’ll explain here:
-
Unlike the official Shopify process, which only adds Google Tag Manager to the non-checkout pages unless you’re an enterprise customer using Shopify Plus, the method I’ll explain will allow you to add Google Tag Manager to all pages of your website (including checkout pages). This is super important for your digital marketing if you’re using Google Tag Manager for tracking or remarketing.
-
For this method to work, you need to have already installed Google Analytics (universal analytics or Google Analytics 4) on your Shopify website for e-commerce tracking. If you haven’t, you can follow this walkthrough to do that. Also, you need to create a Google Analytics account.
The entire process to set up Google Tag Manager on your Shopify account should take no longer than 5 minutes.
Now let’s get started.
If you want to save this tutorial for later, you can download a copy through the form below.
Grab Your GTM Container Code
First, you’ll need to grab the GTM code from your GTM account.
- If you don’t have a GTM account yet, sign up for Google Tag Manager and set up your account. You’ll get your tracking code right away.
- If you already have a Google Tag Manager account for your e-commerce store, log into your account, click “Admin” on the top navigation, and then click “Install Google Tag Manager”.
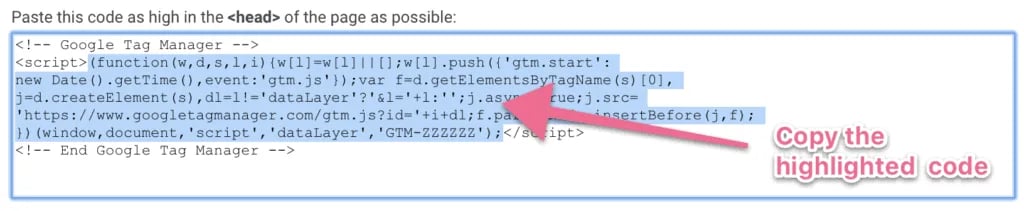
You’ll see two pieces of code.
From this first piece of code snippets, copy everything between the “script” tags (excluding the actual tags). You will need it in the next chapter.
Below that, you will find another piece of tracking code. You can copy this whole thing and save it for the next chapter.
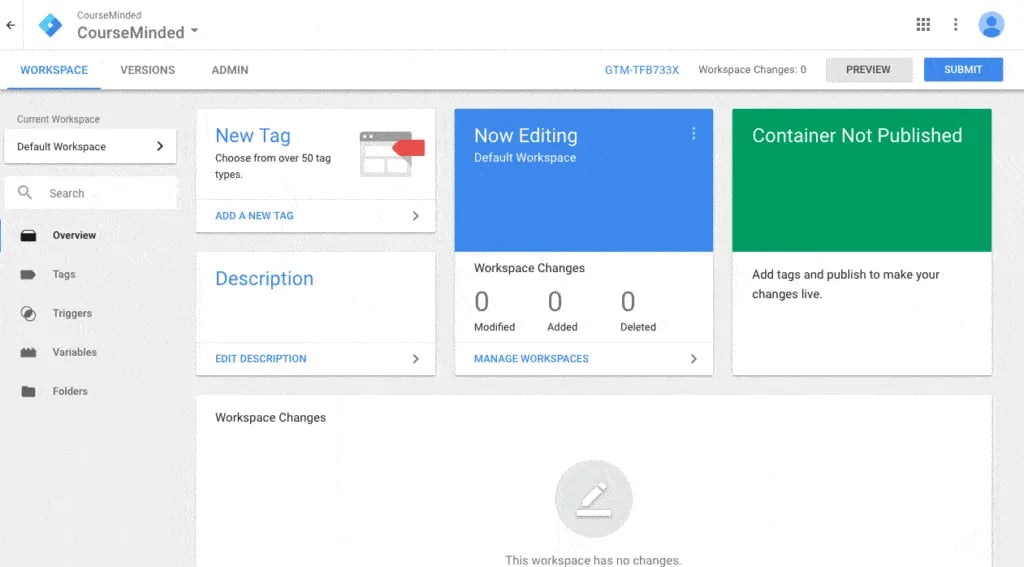
If this is your first time using Google Tag Manager, remember to publish your GTM container by clicking “Submit” and then “Publish”.
Below that, you will find another piece of tracking code. You can copy this whole thing and save it for the next chapter.

If this is your first time using Google Tag Manager, remember to publish your GTM container by clicking “Submit” and then “Publish”.
Adding GTM to Your Shopify Store
In this step, you’ll add the code snippets you got from Google Tag Manager to your Shopify store account.
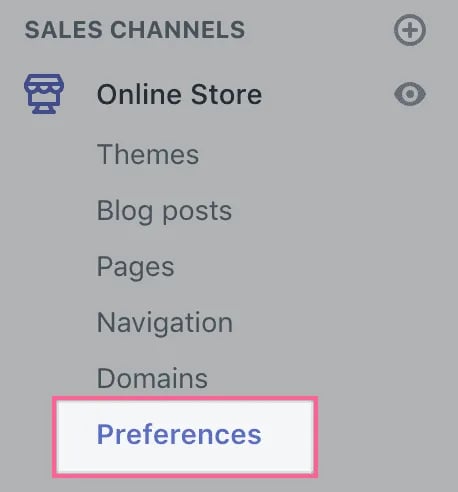
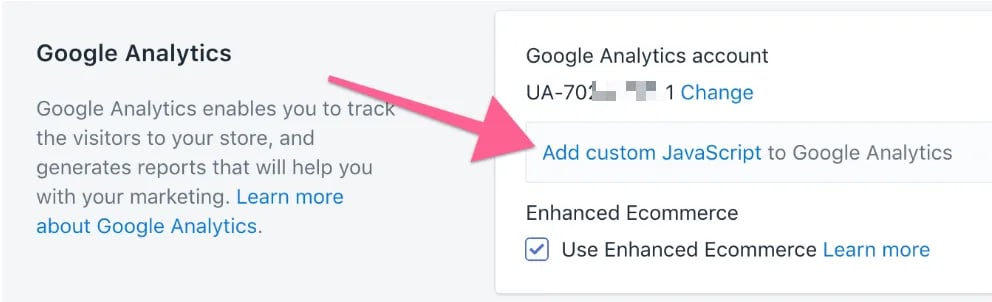
Log into your Shopify store and click on “Preferences” under “Online Store”.
Click “Add custom JavaScript to Google Analytics”.
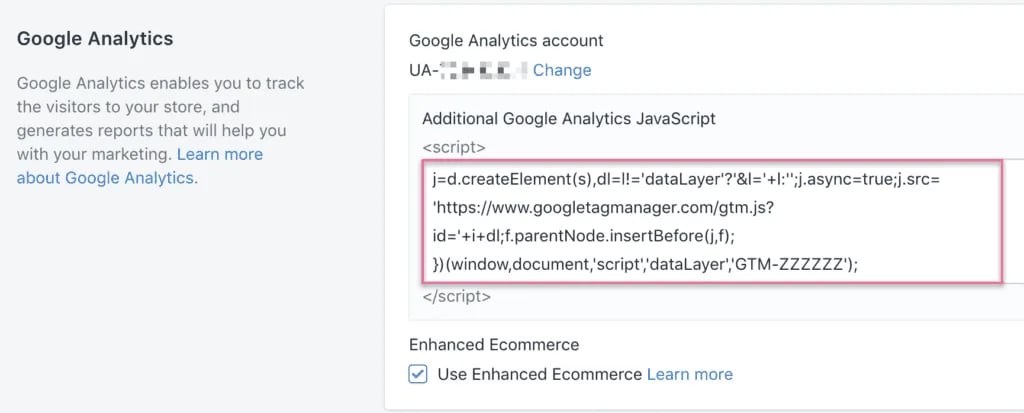
Paste the first piece of code you got from Google Tag Manager on the previous step, and click “Save”.
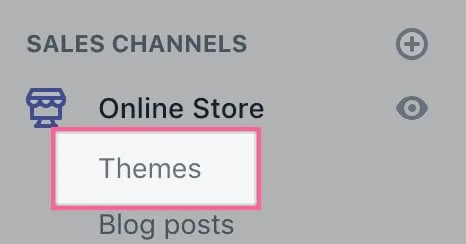
Next, click on “Themes” under “Online Store”.
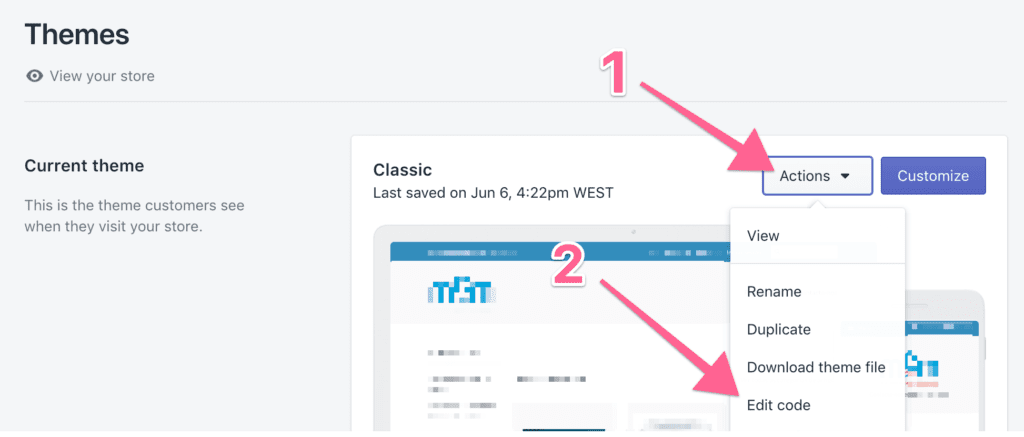
Click “Actions” and then “Edit Code”.
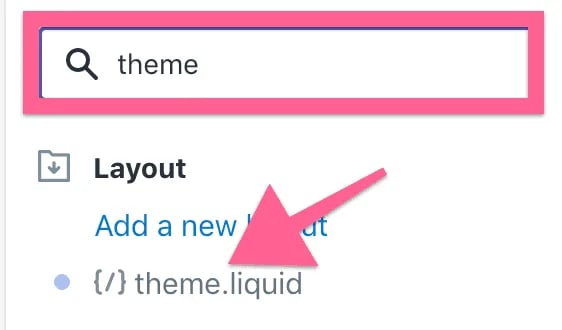
On the search bar, search for and select “theme.liquid file”, which is in the theme files.
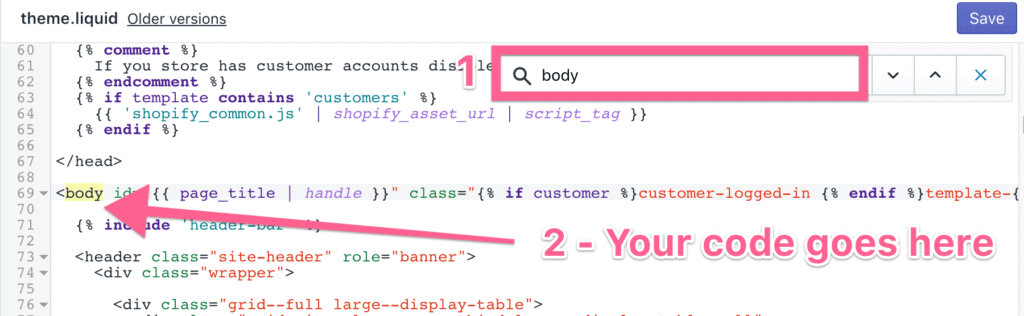
Locate the HTML tag in the GTM code that starts with “<body” (body tag) you can either drop-down until you find it or you can just use your browser’s search feature (typically Ctrl+F for PC, and ⌘+F for Mac).
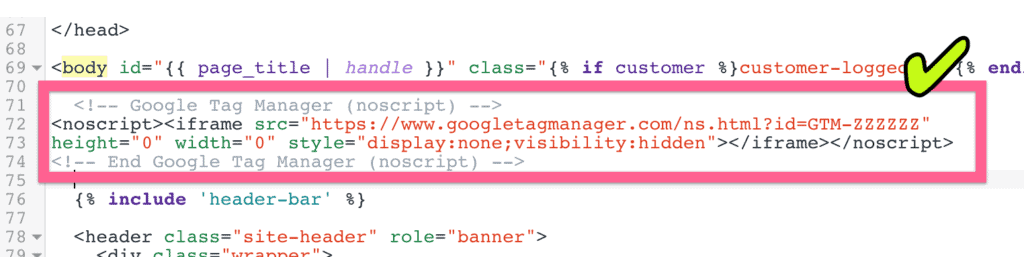
Paste the second piece of code that you got from Google Tag Manager there:
Here’s how it should look:
Finally, click Save in the top right corner.
All that’s left is to check and see if everything is working properly.
Testing Your Installation
To wrap things up, let’s make sure everything is working correctly.
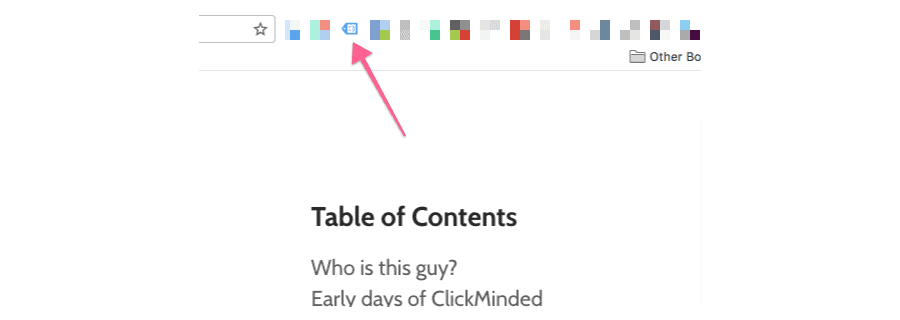
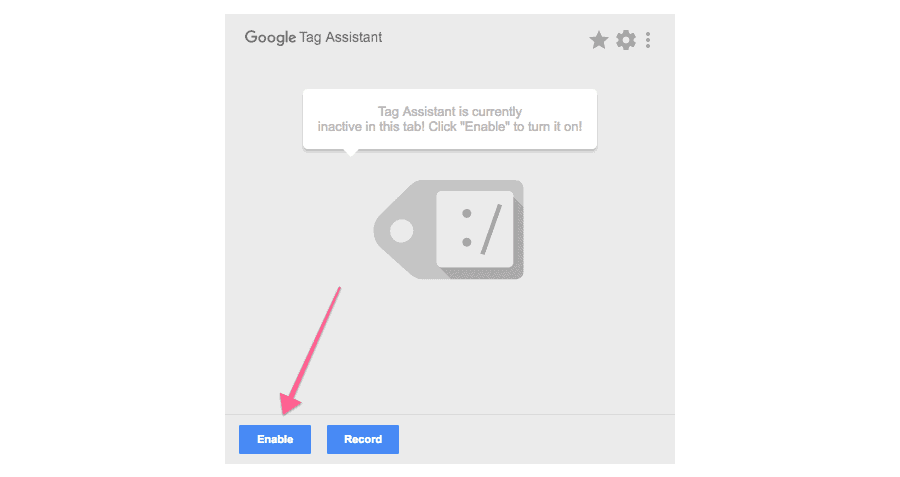
To test, you’ll need to install the Google Tag Assistant Extension on Google Chrome.
Once you’ve done that, open your website and click on the Google Tag Assistant icon.
Click on “Enable”.
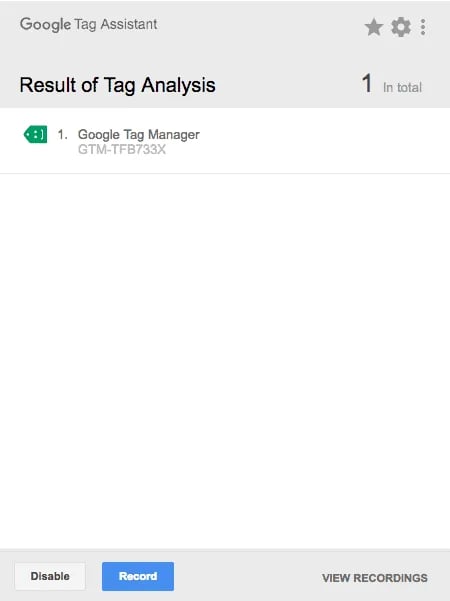
Refresh the page and click on the Google Tag Assistant Chrome Extension again.
You should see a green tag for Google Tag Manager, indicating that the installation was successful.
In Conclusion
If you’ve followed all the steps until now, you’ve now installed Shopify Google Tag Manager on your store, and the container will be included in all your pages—including Shopify checkout pages.
Here are some additional Shopify resources that might be useful:
-
The Complete 29-Point Shopify SEO Checklist For 2024: In this post, we’re going to show you the exact, step-by-step SEO checklist that you can use to optimize your Shopify website.
-
Shopify SEO Checklist Template: Create a powerful Shopify site perfectly optimized for SEO that will drive customers to your site and boost sales. Keep the checklist for reference whenever you want to audit your SEO, or if you create another Shopify store.