The most obvious reason why you’d want to add the Google Ads Global Site Tag to your website is that you’re getting ready to set up a Google Ads remarketing campaign. Adding the remarketing code to your site early on to build your remarketing list is almost as critical as setting up Google Ads conversion tracking in Google Analytics account – it just has to be done.
However, even if you’re not ready to set up a Google Ads remarketing tag campaign, adding a simple new tag from your shared library to your HTML is still a great idea, regardless of the business type you’re running.
By adding it to your website now, you will be able to pixel your users (i.e. start building a remarketing audience of all your website visitors) and, if in the future you want to run a campaign based on who’s already visited your website or a particular area of your website, you will be able to do it.
I’m now going to go through the exact step-by-step process that’s needed to set up Google Ads remarketing tags on a WordPress website.
Overview
Let’s do a high-level overview of adding the Google Ads Global Site Tag (aka remarketing tag) to a WordPress website, which will take you approximately 10-20 minutes.
- The goal: Set up the Google Ads Global Site Tag on your site
- The ideal outcome: Your tag is properly installed and your remarketing audience is now being built inside your Google Ads account.
- Prerequisites: You should have a Google Ads account. If you don’t have one, go to the link and set it up. Also, you should have a Google Tag Manager installed on your site—so make sure you set it up as well if you don’t have one.
- The importance of this action: Remarketing gives you a chance to target people after they have left your website. So you can market to people based on what stage of the funnel they’re in on your website. It could be someone who just visited the homepage and left. Or it could be someone who added a very specific product to the cart and abandoned it at the last minute.
- Where this is done: This is done in your Google Google Ads account.
- When this is done: Only once.
- Who does this: The person who is managing your website, your paid advertising, your analytics, or maybe it’s you.
Get This Entire Walkthrough and All the Resources in This Post
Account Setup
Add your Google Ads tag for remarketing by following these steps:
- Log into your Google Ads account.
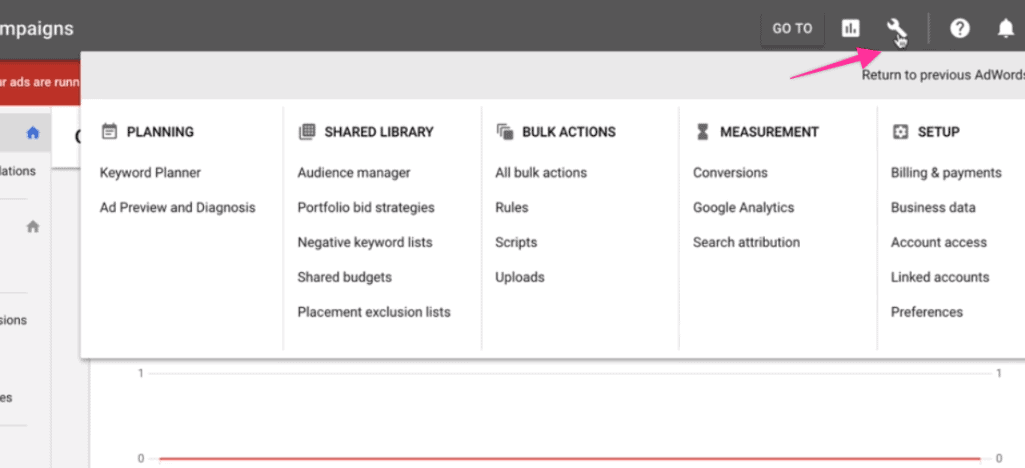
- Click the little wrench up top → Audience Manager.
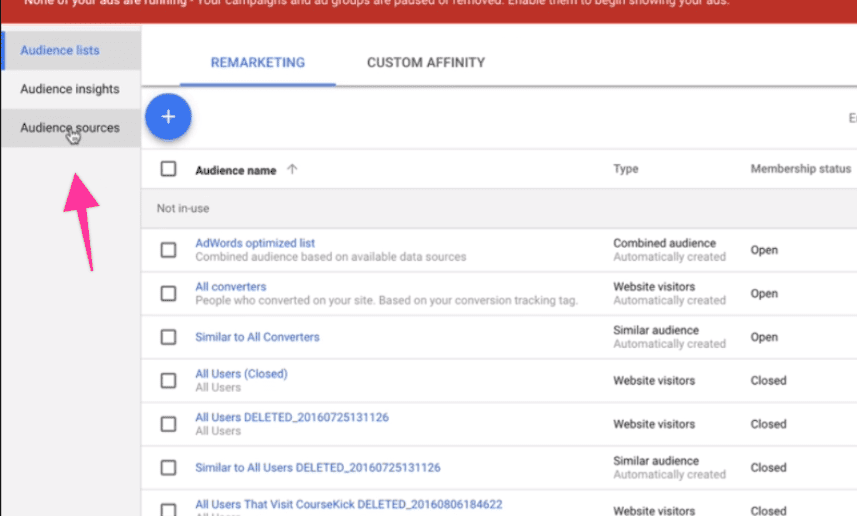
- On the left-hand side, go to Audience Sources and click it.
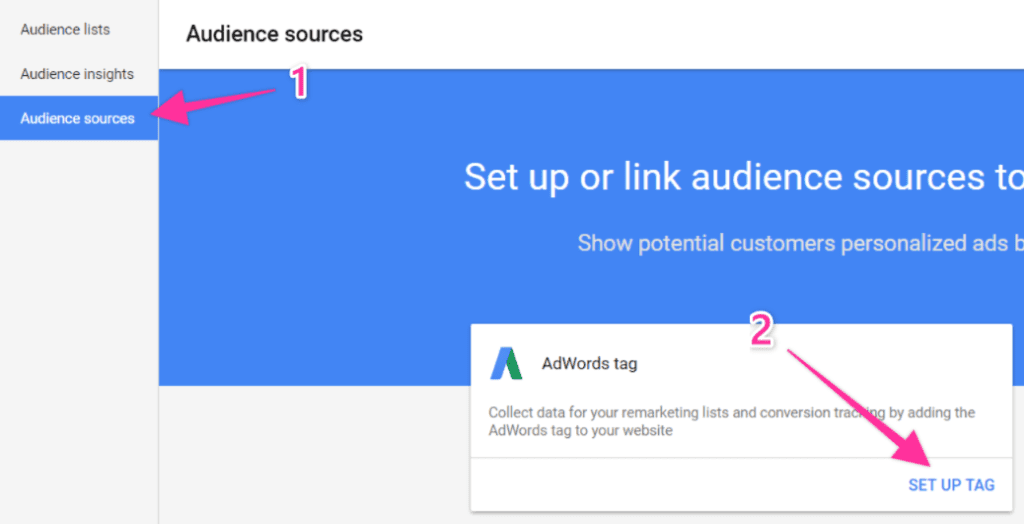
- If you are doing this for the first time, you will see a little walkthrough and a blue link that says “Set Up Tag”. Click that.
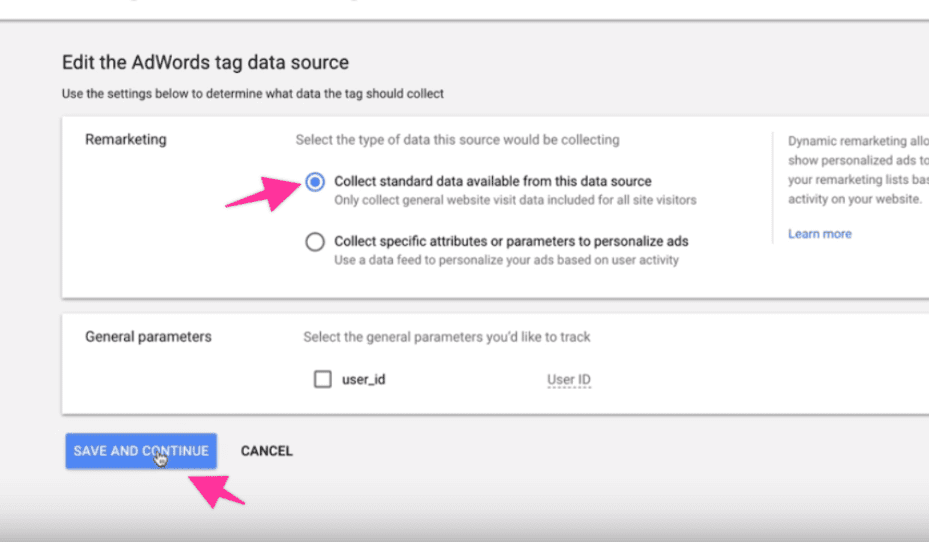
- You will get two options: “Collect standard data” and “Collect specific attributes”. Leave this on the default.
- Click “Save and Continue”.
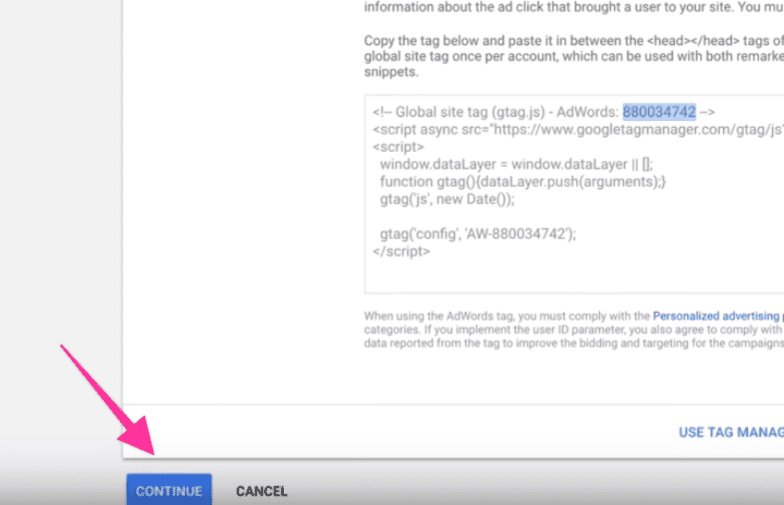
- You will get your global site tag here. Take your Google Ads ID from this, copy and paste it into a note. You will use that later on.

- Click “Continue”.
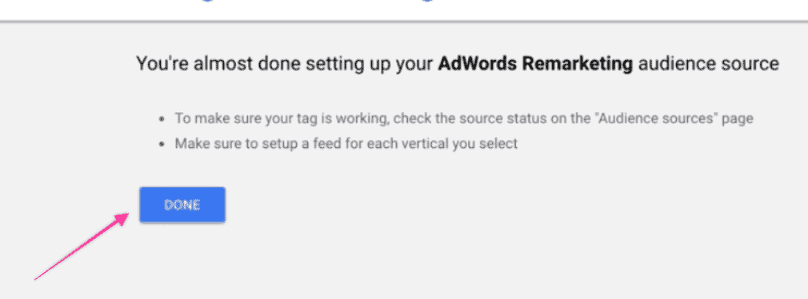
- Click “Done”. You have now successfully set up Google Ads remarketing tag.
Adding Site Tag to Google Tag Manager
Now that you’re done with the Google Ads part of this process, it is time to add the tag to Google Tag Manager. I recommend adding all pixels using Google Tag Manager because it makes it really easy in the future to change or update them.
What I will do is add a variable that will store that Google Ads remarketing conversion ID (the one I copied and pasted into a note earlier on).
Using this variable will make it easy in the future to update the Conversion ID in Google Tag Manager if needed.
For example, if you change agencies, updating all your tags with the new ID can be a huge hassle. Adding the Google Ads variable to your tag instead will allow you to replace your Conversion ID on all tags that use it, in one go.
Here are the steps you need to take to add the remarketing tag to Google Tag Manager:
Adding the variable to Google Tag Manager
- Go to your Google Tag Manager account and log in.
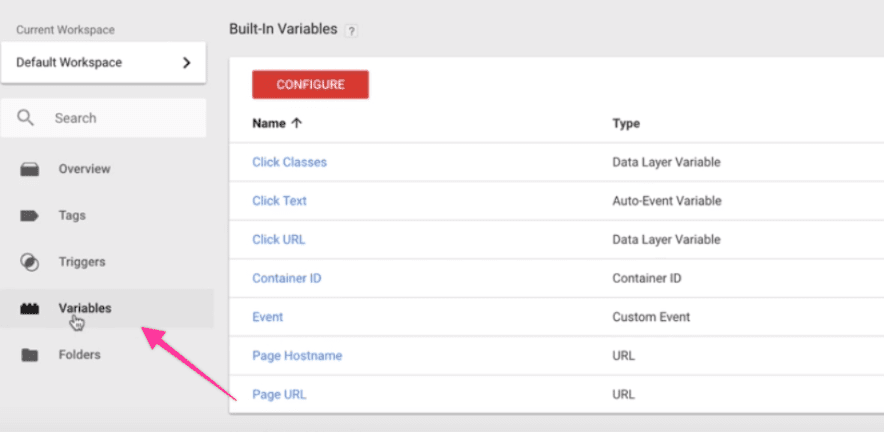
- On the left-hand side, click “Variables”.
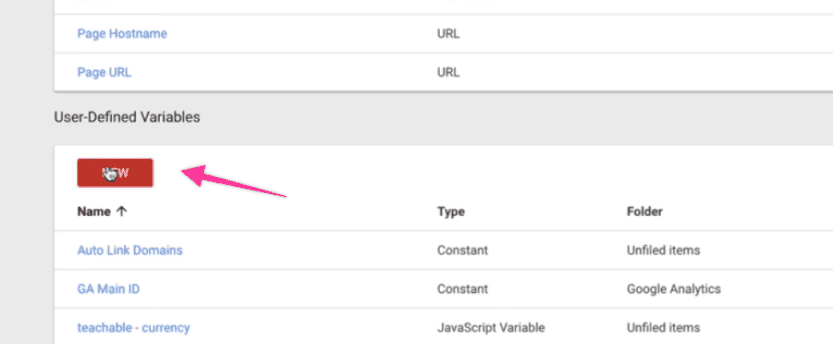
- Scroll down and click “New”.
- Add a name for your new variable. Usually, you want to pick a naming convention that is pretty predictable across your accounts. I went for “GAW_ConversionID.”
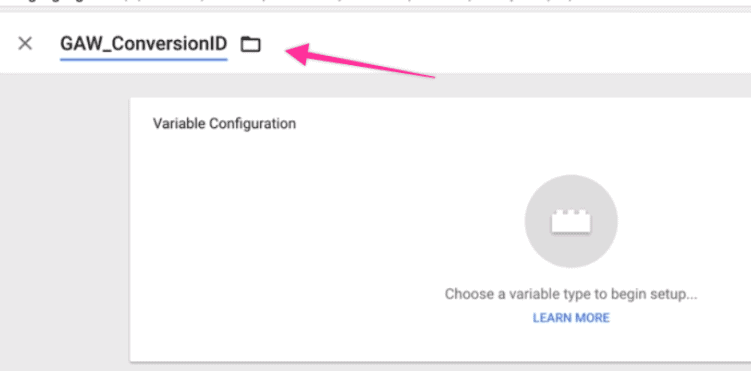
- Click the little pencil at the top right hand side – it will show you all possible variables.
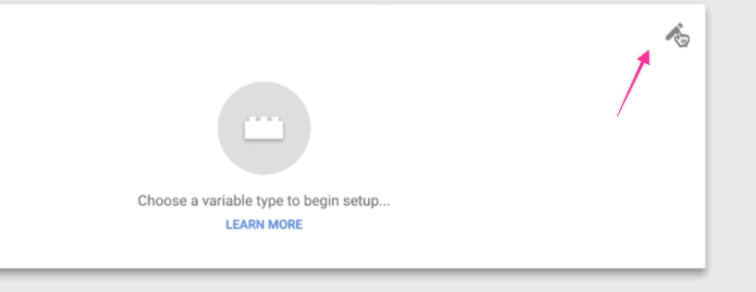
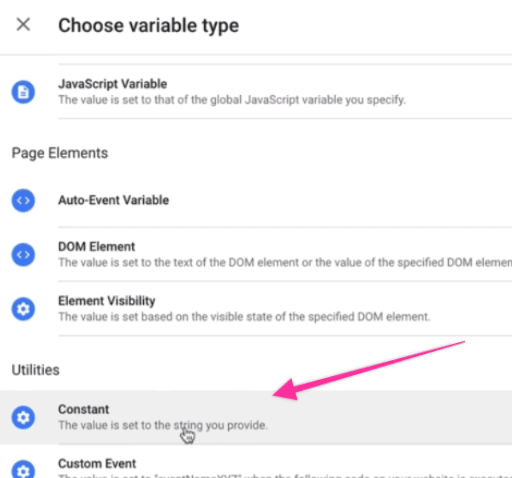
- Scroll down to “Constant” and click it.
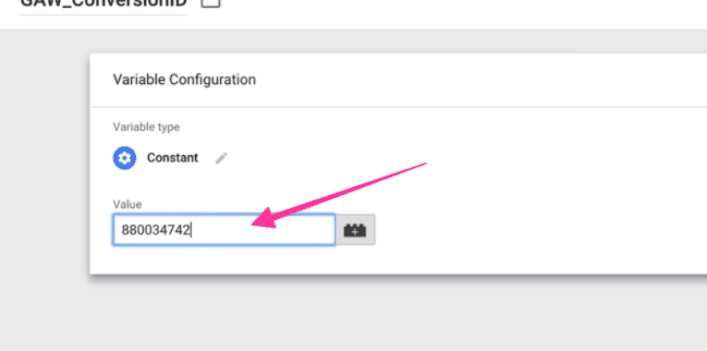
- In the “Value” field, paste the Google Ads remarketing tag ID you copied earlier.
- Go up to the top right-hand and click “Save”. You have now created a Google Ads variable.

Adding the tag to Google Tag Manager
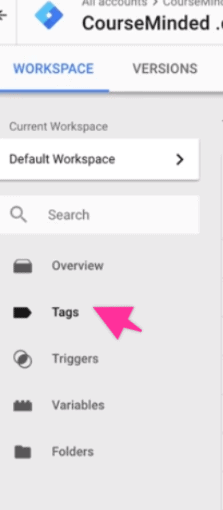
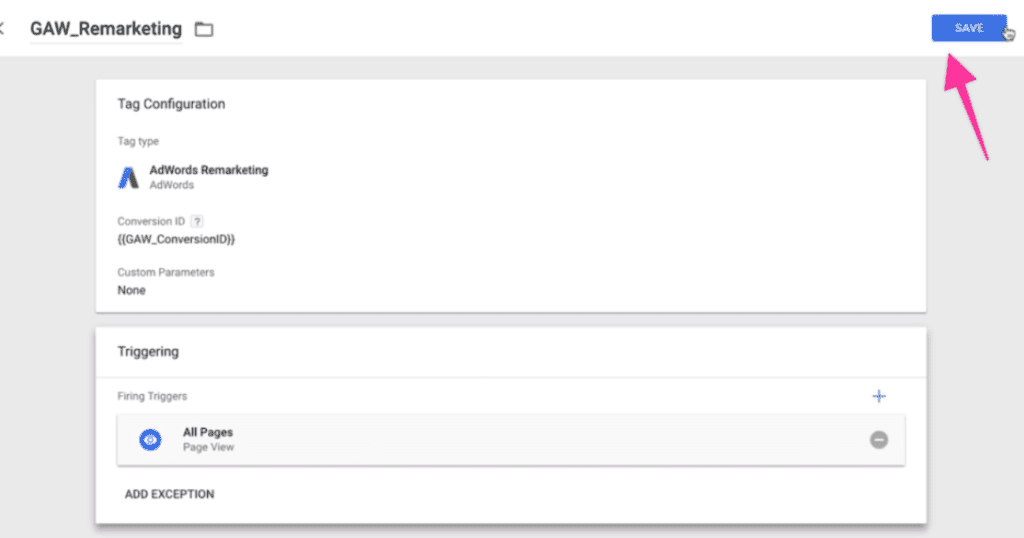
- In Google Tag Manager, go to the top left hand and click “Tags”.
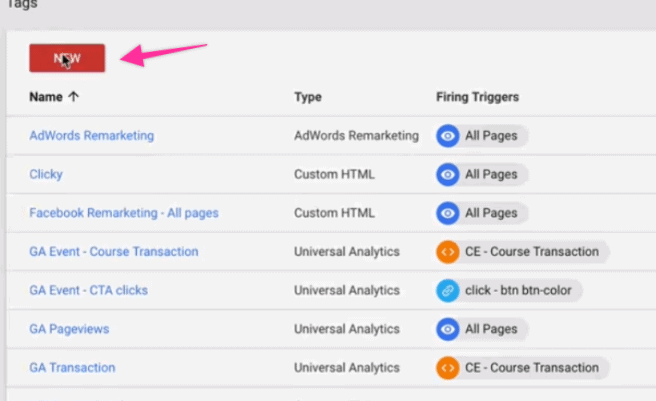
- Click on the big red button that says “New”.
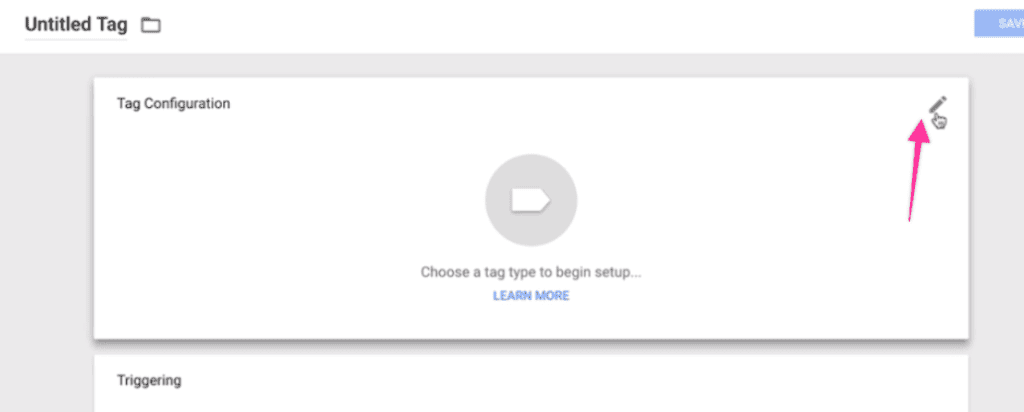
- Under “Tag configuration” on the top right, click that little pencil. This will allow you to edit the tags.
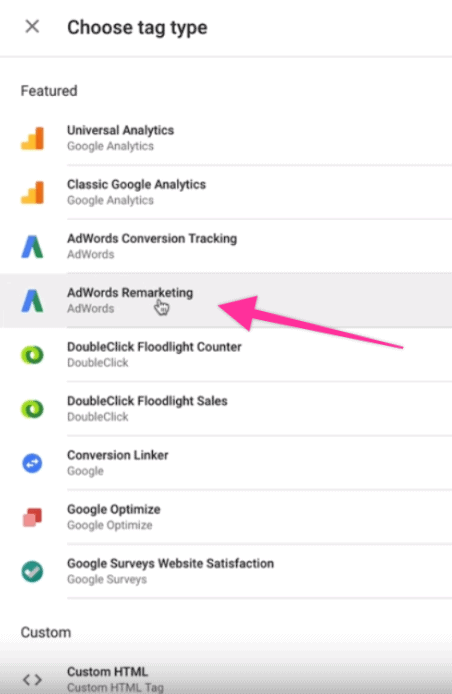
- Go down and click “Google Ads Global Site Tag” to set it up.
- Under conversion ID, click the little “+” sign.
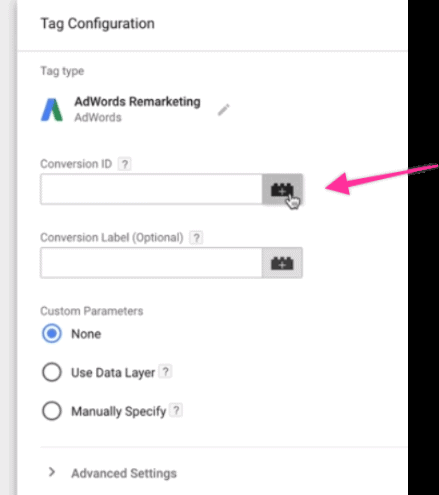
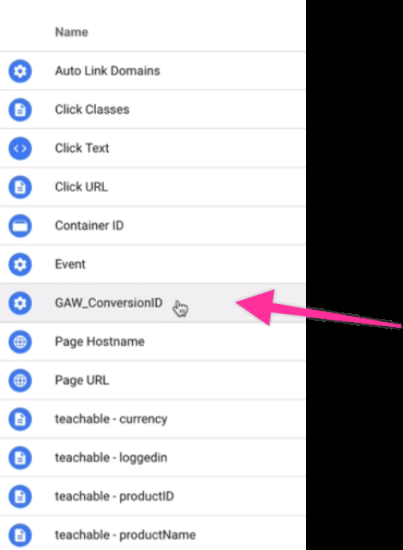
- You will see the variable you have just created earlier (in my case, this was “GAW_ConversionID”). Click that.
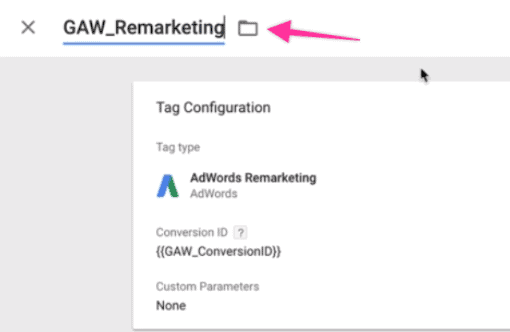
- Pick a naming convention on the upper side of the screen. I like using a “name of the tool + purpose of / what you are doing”, so in my case, this was “GAW_Remarketing”.
Adding the trigger to your tag type in Google Tag Manager
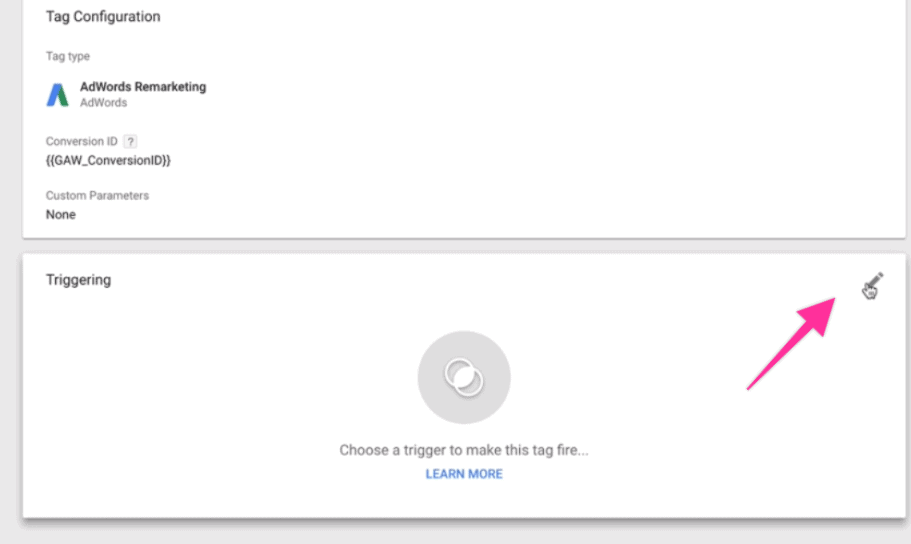
- Now that your variable is all set up and your tag type is ready, you’ll need to set up what will trigger the tag. So, under “Tag Configuration”, you will see “Triggering”.
- Click on the little pencil in the “Triggering” box.
- Click the “+” sign.

- Add a name for your trigger – I called it “All Pages”.
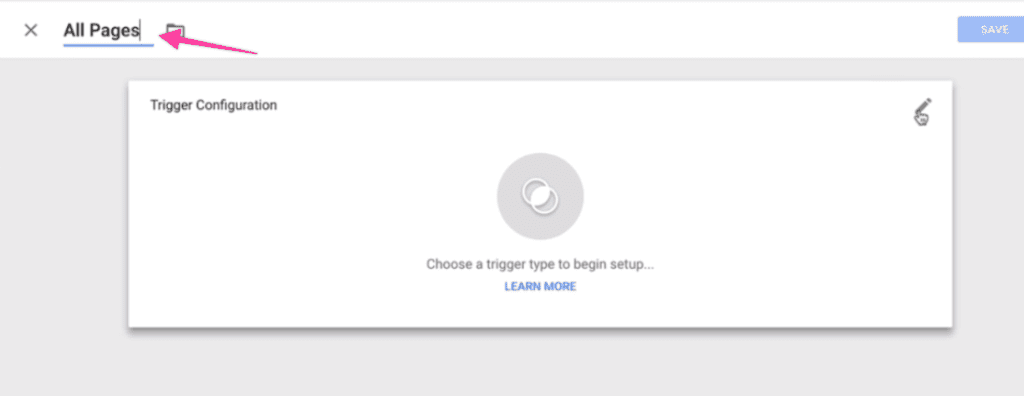
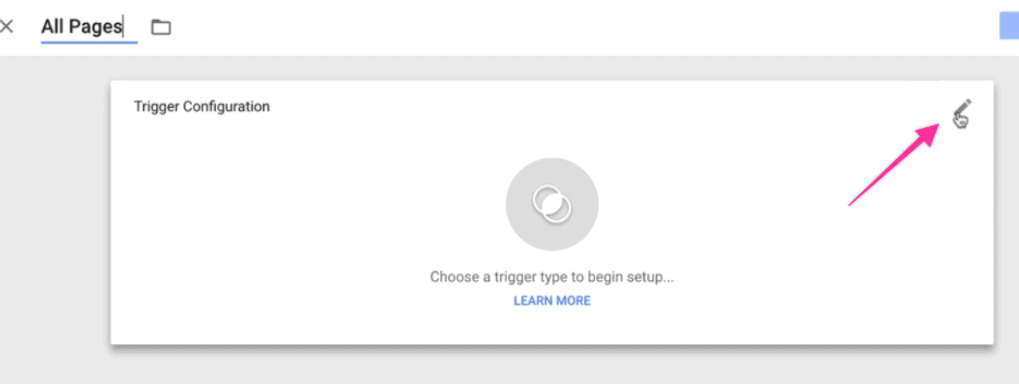
- Click on the little pencil in the “Triggering Configuration” box.
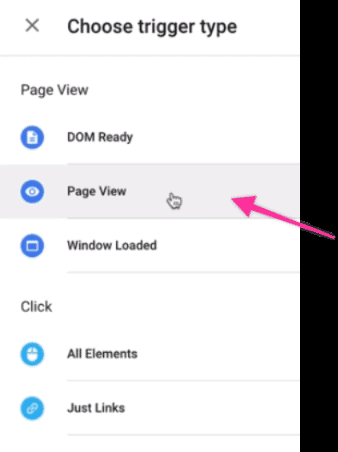
- Click “Page View”. This will be your trigger type.
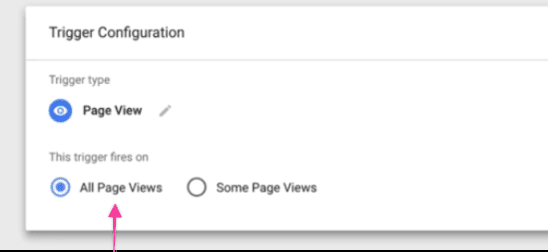
- Under “This trigger fires on”, you will see two options: “All Page Views” and “Some Page Views”. I left the default “All Page Views” option activated here.
- Click “Save”.

- You will be taken back to the “Tag Configuration” page. Click “Save” here as well.
Publishing your container
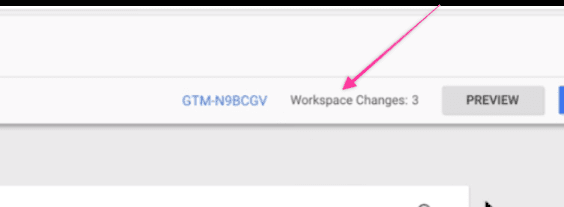
- Go back to your Google Tag Manager main page. Up top, you should see a number of workspace changes.
- In this case, you’ll probably have three (if you created a trigger.) This tells you your Google Tag Manager container has been altered – which, in this case, is a good thing because you actually wanted to make that change.
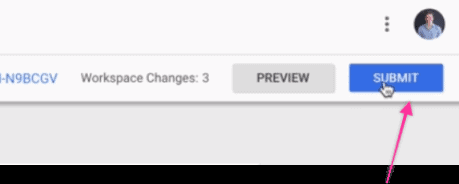
- Go up top and click “Submit”.
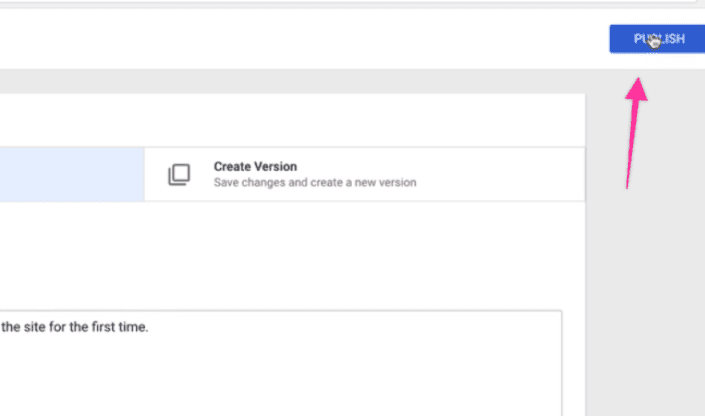
- Add a version name that explains what changes have just been implemented. I called mine “GAW_Remarketing_ V1” and, under “Version Description”, I wrote “Adding Google Ads Global Site Tag to the site for the first time”.
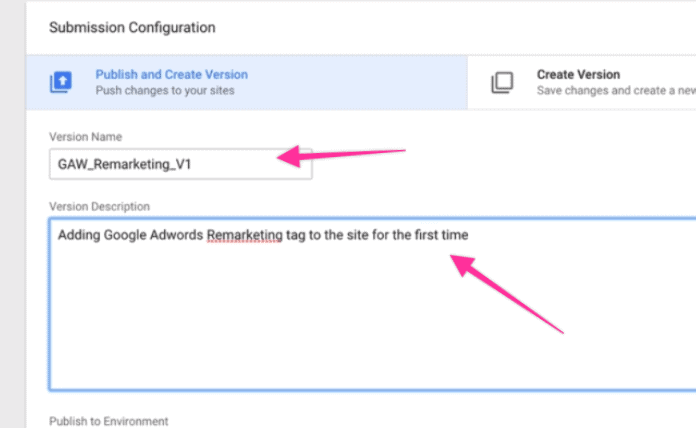
- Click “Publish”. This pixel is now LIVE, firing on your site.
You can see what’s been updated in Google Tag Manager under version changes. Take a look and make sure it all looks correct.

Remember, if you’re adding a new type of tracking, you want to make sure you update your privacy policy, especially if you or your visitors are in the European Union. You want to make sure your current policy is up to date and that users know how and if and when they’re being tracked.
Check For Errors
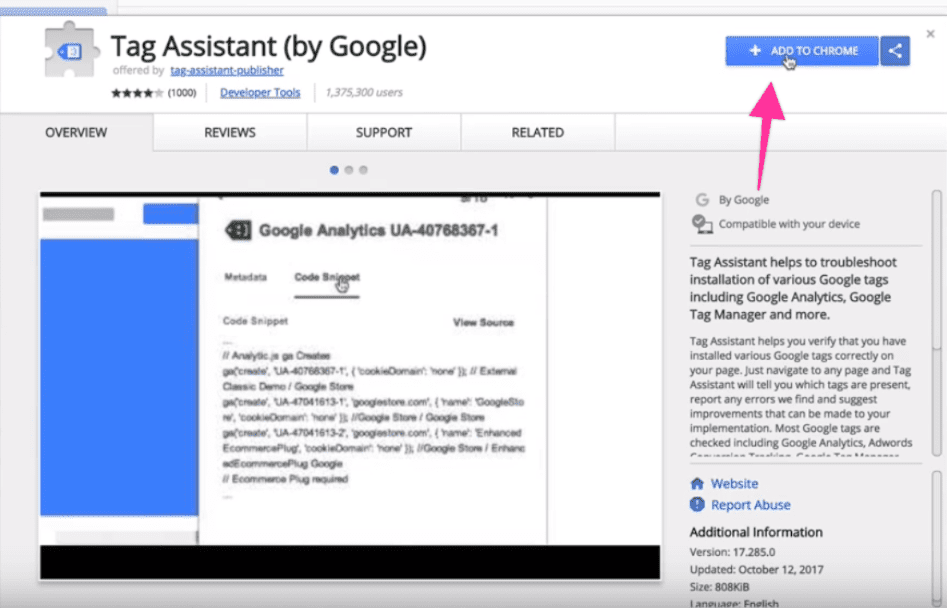
Now that everything is set up, you want to verify and make sure everything is working. One great way to do this is through the Google Tag Assistant Chrome extension. Here’s what you need to do:
- If you haven’t done so yet, open the Google Tag Assistant Chrome extension and add it to Chrome.
- Go to your website.
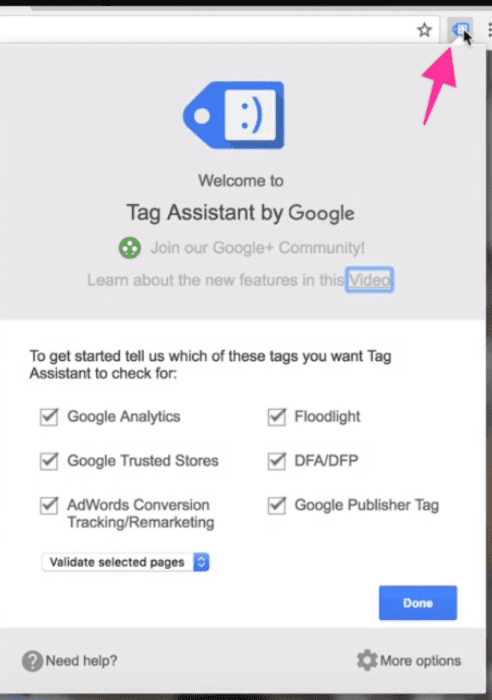
- Click on the Google Tag Assistant.
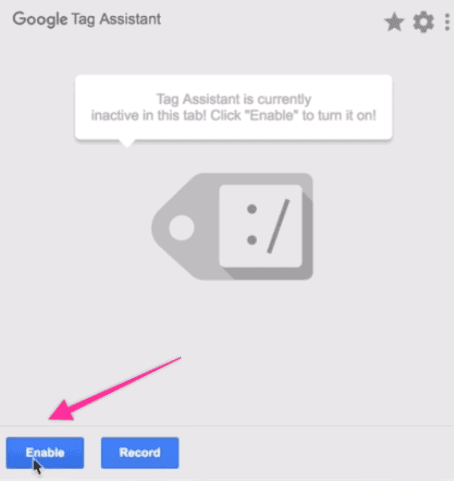
- Click “Enable”.
- Reload the page.
- Open the Google Tag Assistant again. Boom! You’ll see the Google Ads Global Site Tag added there.
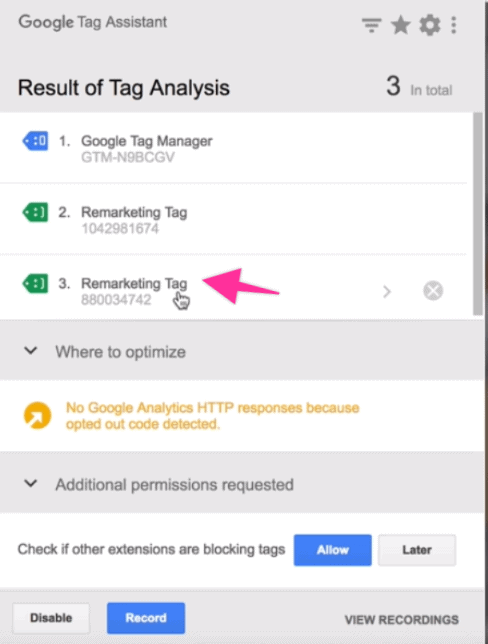
- Because I set the tag up on all pages, I want to check a couple of different pages on the website – and I recommend you do the same. So go ahead and follow the QA procedure above on a few more pages to see if everything is in order.
- Also, you want to check the ID. Look at the ID you copied on your note and look at the ID shown by the Google Tag Assistant. If they’re the same, you’re good.
- If your Google Ads tag isn’t showing, it’s likely that you have an ad blocker installed. Go ahead, disable it and try the QA procedure again.
In Conclusion
That’s it! That’s how you add a Google Ads Global Site Tag to your WordPress website, using Google Tag Manager.
Doing this once will allow you to retarget users that have already been on your website—so it’s a really great pixel to add to your website regardless of whether you want to run a remarketing campaign now, or later on.