


In this blog post, you will learn to be an expert at adding Google Analytics to your Shopify site. It’s perfect for beginners and non-technical people.
With Google Analytics in your e-commerce store, you’ll be able to answer questions like:
- Which channel (social, SEO, ads, etc.) is generating the most revenue?
- What content is attracting the most customers?
- Which marketing campaigns are most or less successful?
If you don’t even have a Google Analytics account yet, the whole process will take you about 15 minutes from start to finish.
Sidenote: if you’re not using Shopify, check out our guides on how to add Google Analytics to WordPress or Squarespace.
Let’s get started.
If you want to save this tutorial for later, you can download a copy through the form below.
Get This Entire Walkthrough and All the Resources in This Post
Getting the Global Site Tag code
This first step is to grab your tracking code from your Google Analytics account.
The Global Site Tag is the tracking code used by Google Analytics.
- If you don’t have a Google Analytics account for this website yet, sign up for Google Analytics and set up your account. You’ll get your tracking info right away.
- If you already have an account on Google Analytics for this website, log into your account, click “Admin” on the sidebar, and then click on “Tracking ID” under the “Property” column.
Your Global Site Tag code (gtag.js) will look something like this: Copy the tracking tag to your clipboard, you’ll need it in the next step.
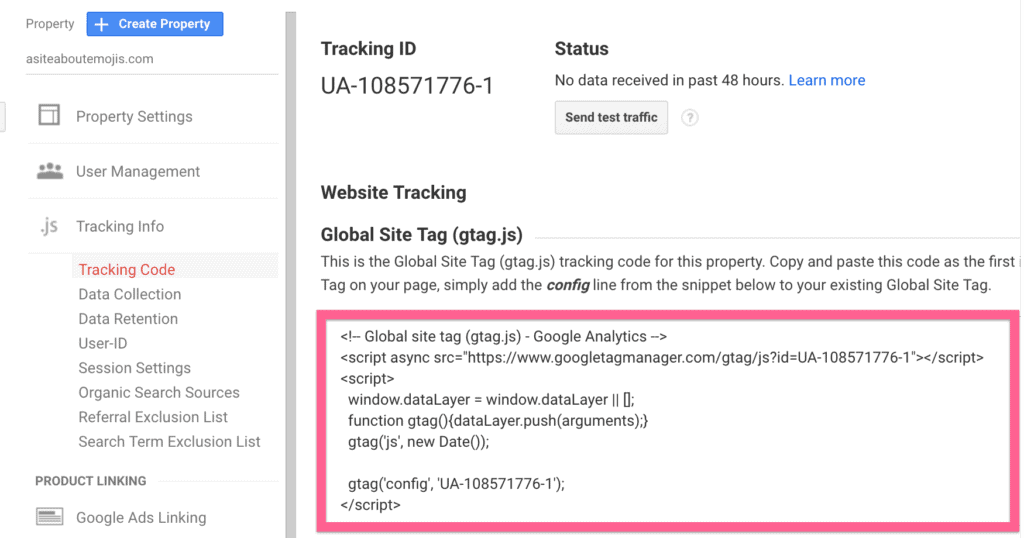
Copy the code to your clipboard, you’ll need it in the next step.
Adding the Global Site Tag code to your Shopify Store
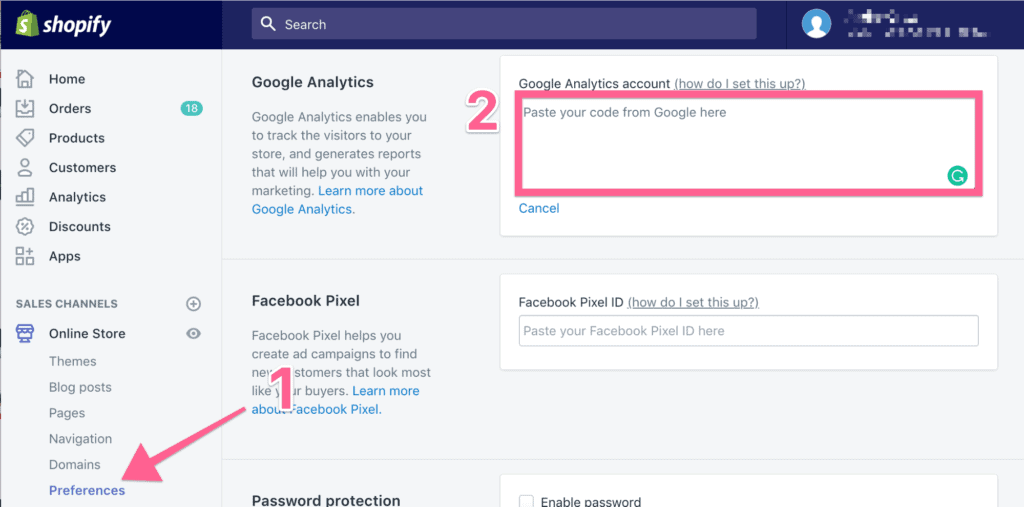
Now it’s time to add your Google Analytics code to your Shopify store.
On your Shopify Admin Panel, click “Online Store” and then “Preferences”. You will find the Google Analytics section input box to enter the Google Analytics code you got in the previous step.
Paste your Google Analytics tracking code in there, and click “Save”.
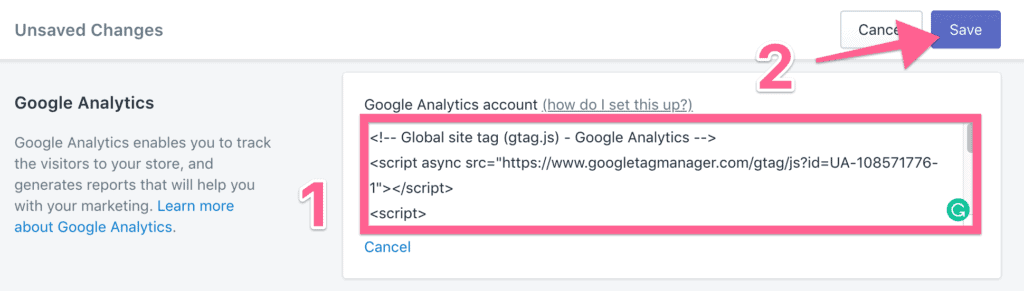
Tick the “Use Enhanced Ecommerce” checkbox and click “Save” again.

That’s it! You’re now tracking your Shopify Store with Google Analytics.
Enabling Ecommerce and Enhanced Ecommerce tracking in Google Analytics
Get powerful ecommerce reports directly inside Google Analytics.
Get real-time powerful e-commerce reports directly inside Shopify Google Analytics.
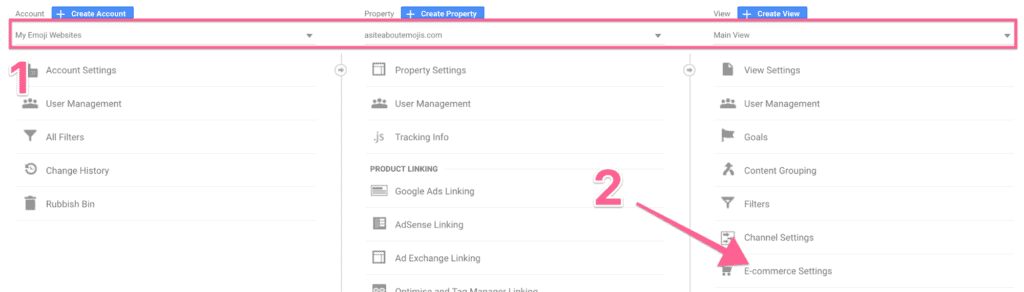
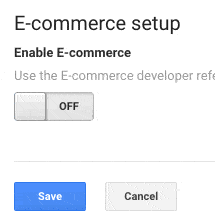
Inside your Google Analytics account, on the sidebar, click “Admin” and then click “Ecommerce Settings” under the “View” column. Toggle “Enable Ecommerce” and “Enable Enhanced Ecommerce Reporting” and hit “Save”.
That’s it! You’ll now get advanced analytics reports of your e-commerce website directly into your Google Analytics account.
Bonus: Setting up views in your Google Analytics account
Set up your Google Analytics account like a pro.
Most marketers set up just one view for their Google Analytics account—it’s usually the one named “All Web Site Data”. In Google Analytics, a “View” is like a lens through which you see all your metrics. For example, you could apply certain filters to a view—like a view for analyzing demographics of only existing customers, or a view for excluding traffic from your team from your reports. Having a single view is alright if you are 100% certain that you won’t be implementing any customizations on your Google Analytics properties. However, we recommend that you create 3 views:
- Main View: This is your go-to view. This is where you will be doing all your analysis of metrics like page views, conversion rate, bounce rate on checkout pages, average order value, and other basic e-commerce analytics. All customizations to Google Analytics should have already been properly tested in the Staging View so as not to affect this view’s data.
- Staging View: Think of this view as your sandbox. If you want to test something new but are unsure how it will affect your analytics reports (e.g.: creating a new filter) you will want to do it here and give it a few days before migrating the changes to the Master View.
- Unfiltered View: This view will be left untouched, no matter what. No customizations whatsoever will be done with this view.
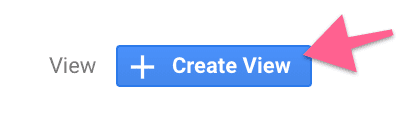
With this structure, you will always have a way to recover lost data in case something goes wrong. The Unfiltered View will always have all your data. And the Main View will have all your filters applied without errors. To set up these views, go to your Google Analytics Admin page. Under “View” click on “Create View”

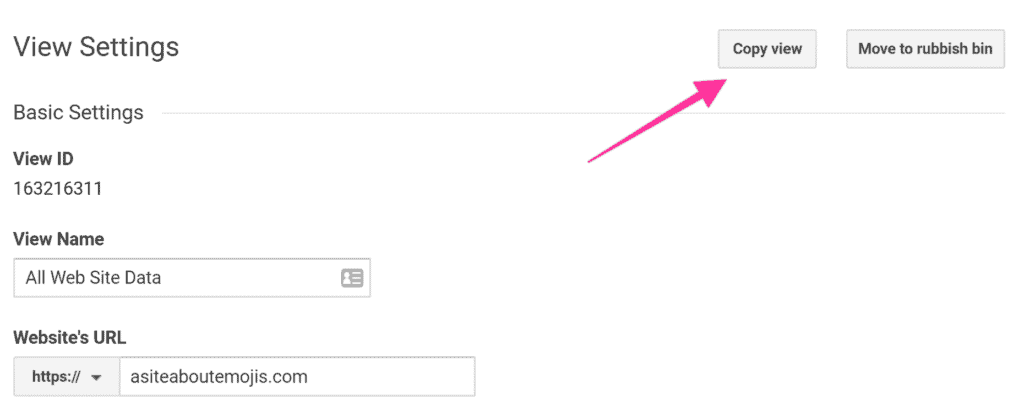
We’re now going to create the Staging View. To do that, select “All Web Site Data” from the dropdown. And click on “View Settings”.

Click “Copy View”.
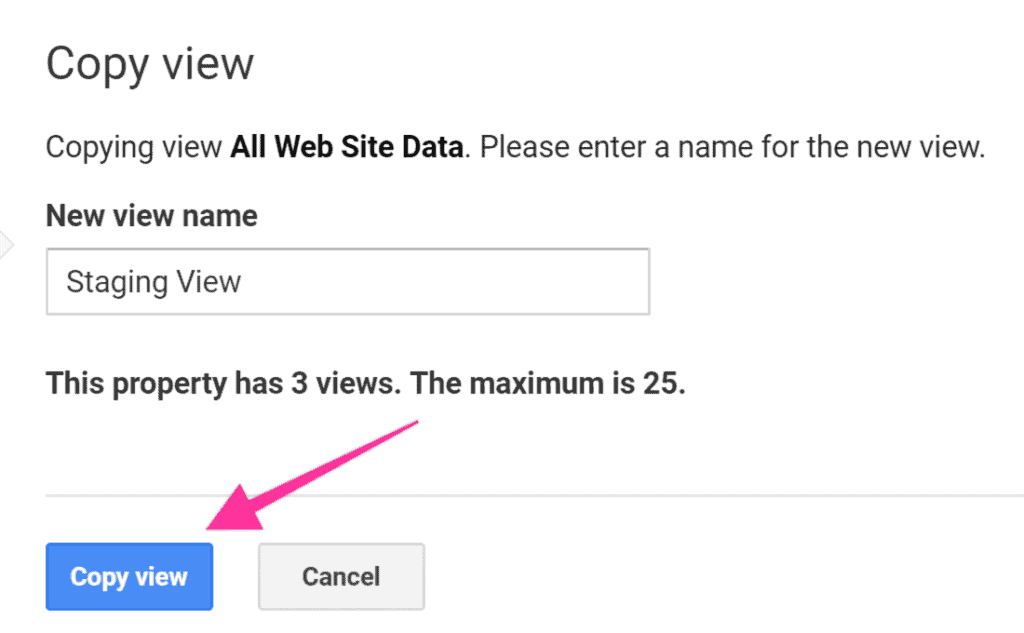
In the “New view name” field, type “Staging View”, and click “Copy View”:
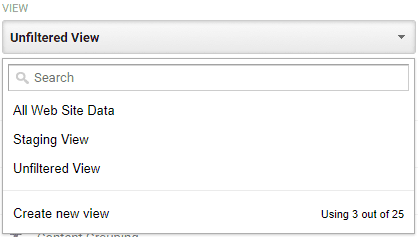
You should now have these 3 views.
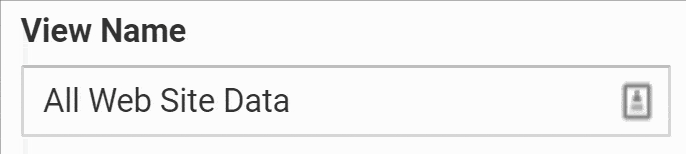
Finally, rename the original “All Website Data” view and we’ll be done. To do it, select the “All Web Site Data” view, click on “View Settings”, and rename it to “Main View”.
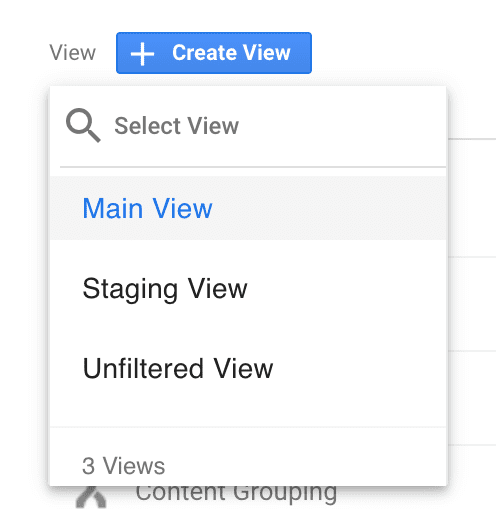
You should now be able to see your three views:
That’s it!
If you’ve been following along, you’ve now installed Google Analytics on your Shopify store, enabled basic e-commerce tracking on your Shopify website, and set up your Google Analytics views like a pro. Google Analytics lets you create custom reports of all your basic e-commerce tracking for your e-commerce platform.
More Resources
- Shopify SEO Checklist: Create a powerful Shopify site perfectly optimized for SEO that will drive customers to your site and boost sales. Keep the checklist for reference whenever you want to audit your SEO, or if you create another Shopify store.
- Ecommerce SEO Checklist: The complete e-commerce SEO checklist for Shopify store owners to get your site ranking and start making money.
- How to Install Google Tag Manager in Shopify: In this post, we will show you how to add Google Tag Manager to your Shopify website.
That’s it! That’s how you get an expert at adding google analytics to Shopify!

